Hi! I’m Haylie and I’m the Chicago Experience Launcher for AmazingCo.
A recent experience I created in Chicago focused on Coffee and Confections. One of the stops on this tour was a cream puff bakery! Here you could CYOP (create your own puff) by choosing the shell flavor, the filling flavor, and the toppings. It got me thinking… I can make that from scratch…right?! So here I am — figuring out the answer to that very question.
Join me as I take on the challenge of creating these delicious pastry balls at home. You’ll hear all the highs and lows and I’ll let you in on a few hot baking tips too.

Thoughts Before Baking:
I’m a pretty decent baker. I make great chocolate chip cookies, and awesome holiday desserts, and I can frost a cupcake like nobody’s business. Here’s the thing: past very simple recipes, my baking knowledge is based mostly on my many, many hours of consuming the Food Network’s competition shows. And if these baking competitors have taught me anything, it’s that Pâte à Choux dough is TRICKY and can easily go wrong. Of course, much to my displeasure, Pâte à Choux is the base for a cream puff recipe. This scary pastry dough, by the way, is pronounced pat-a-shoe.
The recipe I’ve selected is from Natasha’s Kitchen. There’s a nice breakdown of why things go wrong and truthfully, she looks like she’d be nice to me if I screwed something up in her kitchen. Plus! The second line at the top of the page is “The choux pastry dough is easier than you think”. Okay, Natasha, I hope you’re right.
Equipment:
In taking a look through the equipment list, I don’t think there’s anything too out of the ordinary.
3 Qt Medium saucepan with a wooden spoon
Electric Hand Mixer (or stand mixer with whisk attachment)
Pastry Bag with 1/2″ Round Tip (without the tip, you can cut a 1/2″ diameter tip from a disposable pastry bag)
Baking Sheet lined with Silpat or parchment paper
As I mentioned before, my baking talents don’t extend much past the basics, so I don’t have any pastry bags or tips. I am pretty crafty though, so my plan is to use a gallon sized plastic baggie and cut off one of the bottom corners.
Ingredients:
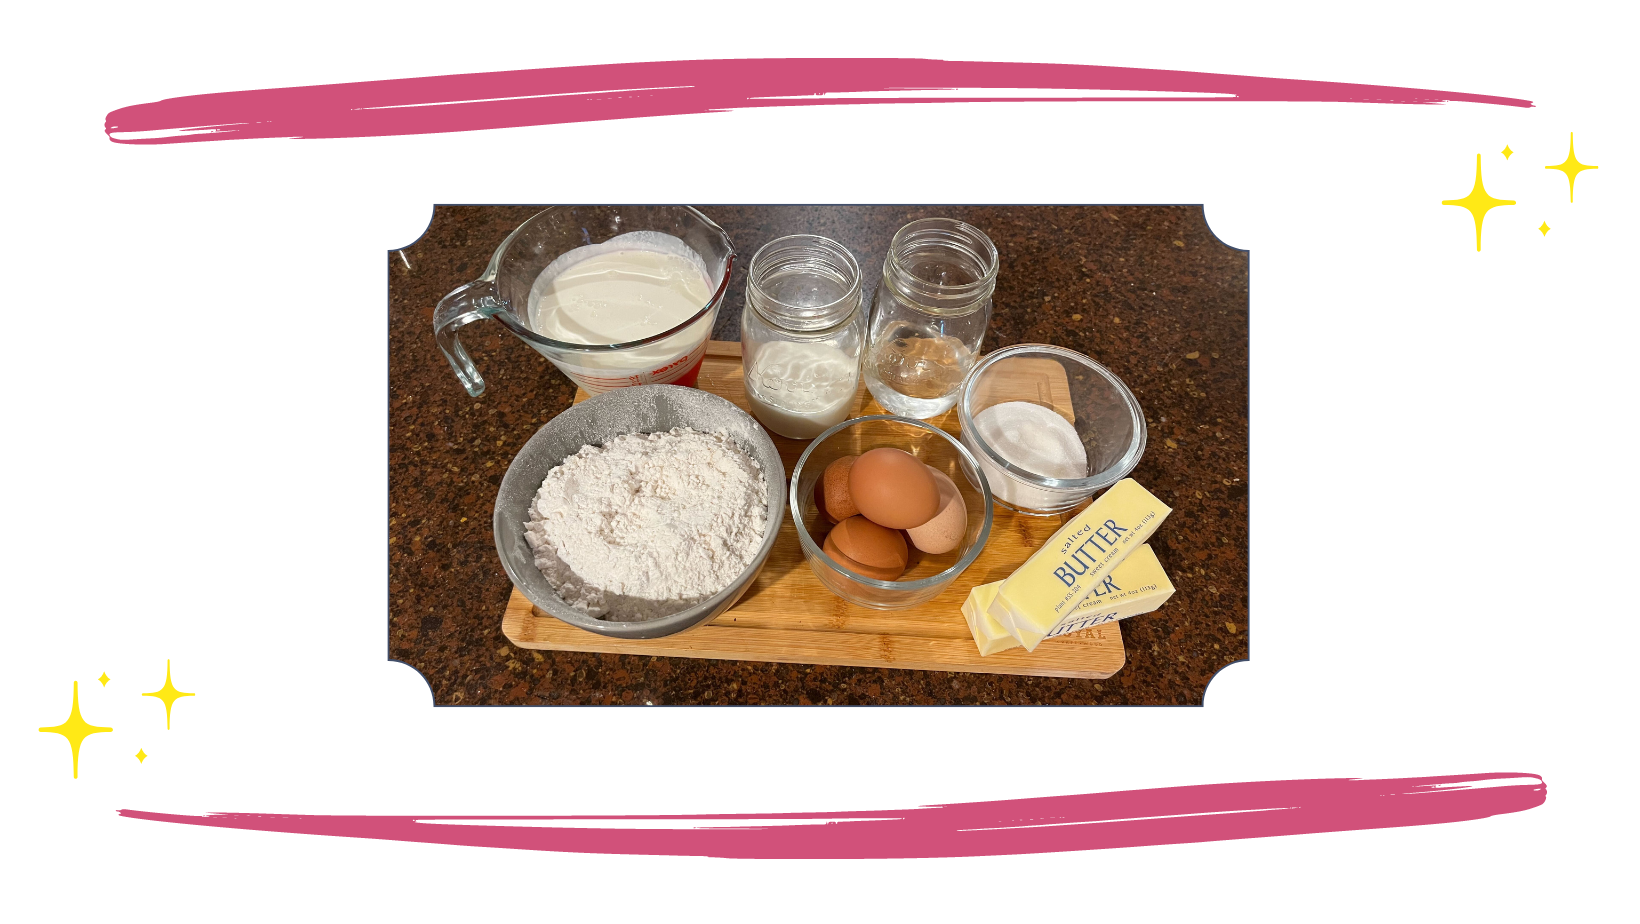
Time to prep the ingredients. The recipe says that it makes 28 puffs. That feels like a lot to me, but my mama always taught me to follow a recipe exactly as written the first time I make it. Then the second time, all bets are off. So for this first go around, I guess we’re making 28 puffs.
Ingredients for Choux Pastry:
1/2 cup water
1/2 cup whole milk
8 Tbsp unsalted butter
1 tsp granulated sugar
1/4 tsp salt
1 cup all-purpose flour, measured correctly
4 eggs, (large), room temperature
Ingredients for Cream Filling and Garnish:
2 cups heavy whipping cream, chilled
4 Tbsp granulated sugar
1 tsp vanilla extract
28 raspberries, optional
1 Tbsp powdered sugar, to garnish
A couple of things- I want it noted that the “measured correctly” note was pulled as is from the recipe’s website. I’m sensing some hostility. Who burned you, Natasha?
This is also making me question my measuring abilities. Next, since this experiment was inspired by the CYOP experience in Chicago, I am going to put a little twist on the filling. I’m much more of a chocolate kind of gal than a raspberry one. So, I think I’m going to swap the raspberries out for something chocolatey instead. Maybe crushed sandwich cookies? Maybe mini chocolate chips? I’m hoping inspiration will just strike when it’s time to make the cream.

Thoughts During Baking:
Okay, so I started off strong by measuring out all of my ingredients and trying to make them look as pretty as Natasha did on her site (see my attempt above). There were a few things I wanted to call out:
I know the recipe calls for unsalted butter. I only use salted butter because I think it tastes better, so I just eliminated the extra salt in the ingredient list.
I used fresh eggs, meaning that they’re all different sizes. I was hopeful that this wouldn’t cause an issue later on.
I literally googled “how to measure flour correctly” because I didn’t want Natasha to get snarky. Spoiler alert: “The most accurate way to measure flour is to use a digital scale. Weighing flour is better than measuring it by volume, because when you weigh it, you avoid all the problems associated with its density, or lack thereof.” One cup of flour is about 125-130 grams or 4.5 ounces. Thanks, FoodNetwork.com.
Making the Choux:
As expected, this part gave me some anxiety. By the time I was finished I was drenched in sweat and covered in flour. I think adding the eggs was the toughest part. According to the recipe, before adding each egg I had to make sure the previous one was fully incorporated. The first element that made it so nerve-wracking was the fact that the dough had just come off the stove, so it was really hot. I was worried that adding the egg to the hot dough would make it scramble, thus ruining the entire thing. Luckily, it didn’t. The other piece that made me feel a little iffy was the texture change. Obviously adding the eggs made the dough super liquidy. Once I beat it for another minute, the consistency went back to how it should be, so no harm done, but it definitely gave me pause.
Piping the Puffs:
I mentioned earlier that I don’t have any piping bags, so I used a plastic baggie. I actually think this method worked out pretty well! I have this random green bag holder that I’ve never used, but got as a stocking stuffer a few years ago (hi, mom!). Believe it or not, this little guy was super helpful in filling up my makeshift piping bag. It holds the bag open while you fill it. I wasn’t entirely sure how to actually pipe the dough onto the baking sheet, so I started by going in a swirly pattern. I quickly learned it was better to just stay in one place and let the dough form its own ball. I started by trying to fit four puffs across and then decided that they’d be too tight, so I switched to 3 across giving me 13 puffs total. I did have some choux left in the bag, but definitely not enough for an additional 15 puffs, which obviously meant I made mine way too big. Whoops.


Thoughts After Baking:
The puffs were ready with the exact timing of the recipe. Way to go, Natasha. Honestly, I’m impressed. They look way better than I expected them to too!
Making the Filling:
The instructions for the filling was pretty simple. My only advice: stop mixing when it’s stiff. Don’t beat it to death or it’ll look curdle-y. Once I made the base, it was time for my flavoring. Here’s where I got to be a little creative. I decided a sandwich cookie cream was for sure the way to go. I started by crushing up about 8 cookies. Once I made the filling like the recipe said, I added in my crushed cookies. I obviously needed to taste test. No worries folks, it was delicious. I used my handy dandy green guy to hold the bag while I filled the “piping bag” again.
Filling the Puffs:
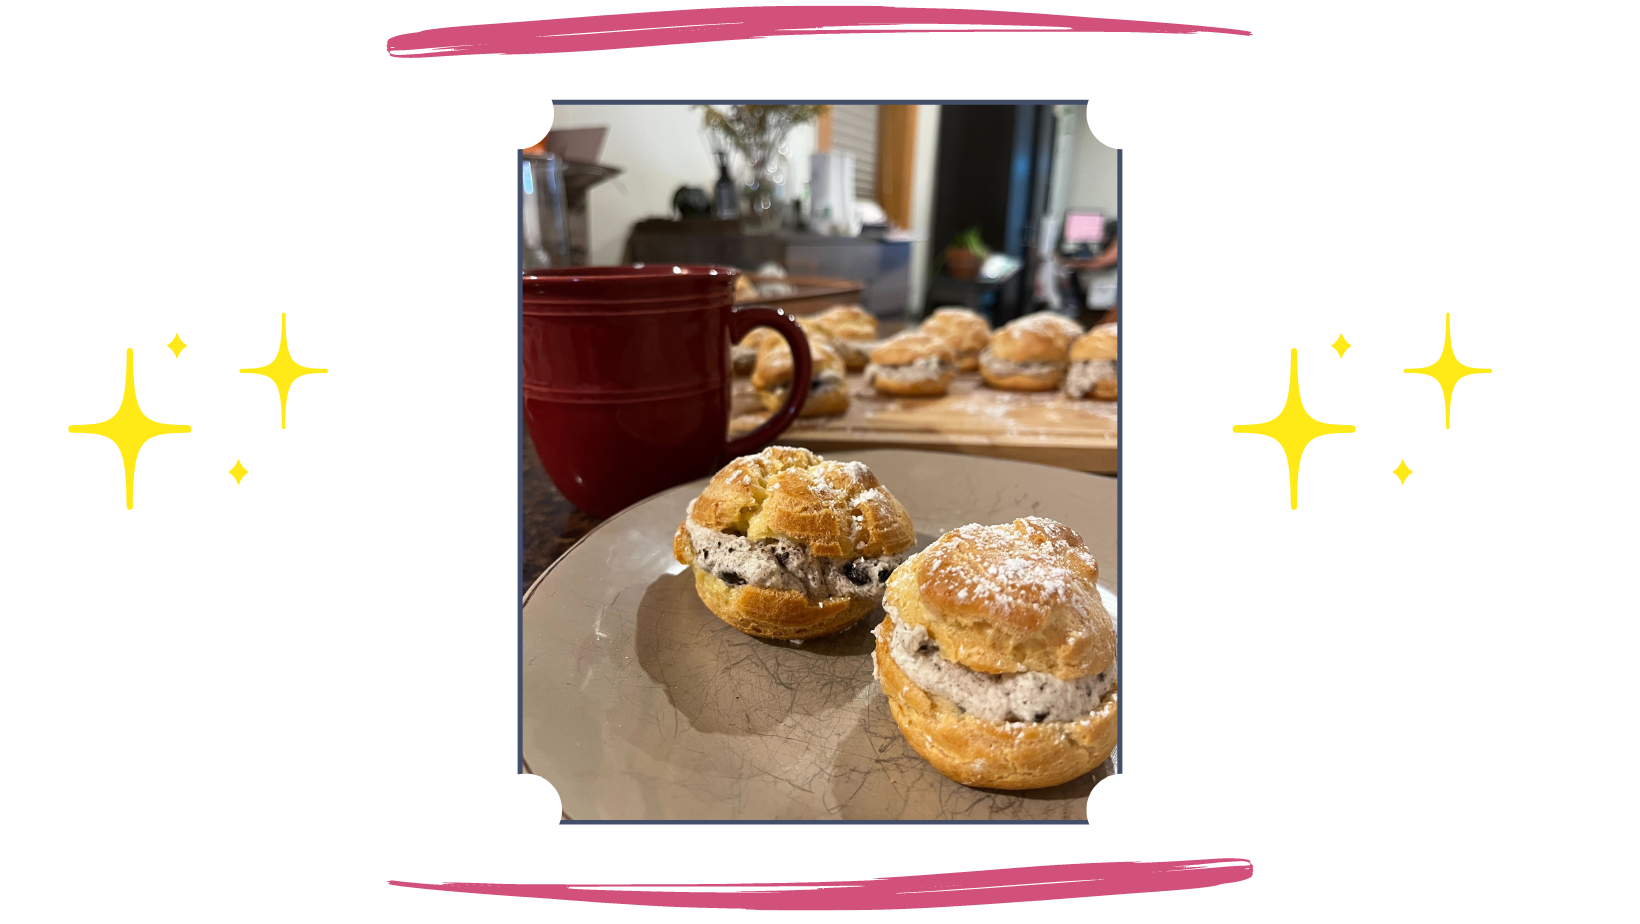
Because of my lack of piping bag tip, I had to go with the slice and fill method. Once all the puffs cooled, I cut each one in half, which was surprisingly pretty simple. Doing this solidified that I got the dough right. They were actually hollow and all puffed up like they were supposed to be! I filled them the same way I piped the dough onto the baking sheet, then closed them up. To finish off (and really make them look impressive) I sprinkled them with some powdered sugar.
Eating the Puffs:
I have to say, I was REALLY impressed with myself, y’all! These were delicious and way more doable than I expected! Next time, I still think I’ll stick to following Natasha’s choux recipe, but I’ll totally keep playing around with the filling. I will say, I feel a whole lot more confident to try scary recipes after conquering the choux!


Five Final Tips:
Tip #1 -
Read the entire recipe through before starting. Some of the steps move pretty quickly and you don’t want to be stuck not knowing what’s next.
Tip #2 -
Don’t panic about adding the eggs. As long as you beat the dough for a minute or two before adding them, they won’t scramble and you’ll be good to go. Yes, making the choux is hard! But you can do hard things!
Tip #3 -
Splurge for the piping bags and actual tips. While my way worked fine, piping the dough and filling the puffs would have been easier (and probably more fun) if I had the right stuff.
Tip #4 -
Play! Baking is fun. While I recommend following instructions for the pastry dough, get creative with the filling! Make it feel like you.
Tip #5 -
While it makes for an awesome photo, don’t fill all of your puffs unless you’re planning to eat all of your puffs. They’re so much easier to store without the filling in them. Plus, they won’t get soggy. (Disclaimer: soggy puffs are still pretty good, though)
✨ Bonus Tip -
As with most desserts, these puffs are enjoyed best when served with good company, good conversation, and a good cup of coffee. 💛