
Hi! I’m Kaicea, AmazingCo’s Experience Launcher in Sydney, Australia.
Desserts have been on my mind A LOT lately. Why? You ask. Well, I’ve been creating two experiences that revolve around global culinary delights! I’ve also just moved into a new apartment with a swanky kitchen, so I’m inspired to put it to good use and host a housewarming party.
Instead of buying something from a bakery, I want to make something fresh and homemade for friends and family when they come over. One dessert I always drool over is Crème Brûlée. Imagine the sound of the caramelised top being cracked open, the smooth custard a little bouncy on the spoon, the vanilla scent wafting towards your nostrils, and then - BAM! - the most decadent, silky smooth creamy flavour on your tastebuds.
But it’s not every day someone casually offers you a Crème Brûlée when you’re invited for dinner, is it? Is it so difficult to make that only fine dining establishments do it? Are the ingredients tricky to find? Is there a fire hazard risk I should be aware of?
As a bit of practice run for my home-warming party, I decided to put my culinary skills to the test and create my very own Crème Brûlée.
Keep reading to find out what happened next!
I learnt a lot.

Crème Brûlée: A history in a nutshell (or an eggshell, if you like)
So popular is Crème Brûlée that countries squabble over the origins of this dessert. The first recording of a custard treat was in France in 1691, however, the Spanish began adding the crunchy caramelised top to their version, much later in the 18th century. Throw in the English with the “Trinity Cream”, an unsweetened and thicker version of the dish with Trinity College’s crest burnt onto the top of the custard, and you’ve got a mysterious history. Despite the different tales, it wasn’t until the 1980s where Crème Brûlée became a restaurant staple, with New York restaurant Le Cirque bringing the custard to the mainstream.

The idea of baking Crème Brûlée intimidated me. I enjoy cooking because I can estimate the measurements and it always ends up turning out well! I like to think I’ve got my fair share of recipes down pat (if you need dinner ideas let me know).
However, desserts are a different beast. Baking is all about measurements and numbers. I’m not very mathematical, so I could envision myself not whisking a custard enough, making the oven too hot, or the finished product coming out solid- there are so many fine variables to baking Creme Brûlée and baking in general! That’s why I’ve tended to leave baking to the professionals - chefs, cafes, and my auntie.
To see if my thoughts were similar to others, I actually went on a couple of forums to read what people had done while trying to make Creme Brûlée at home. There were many blunders online - Creme Brûlée with bubbles on the top, burning the custard and not the sugar top, not using the right cream…I could go on. That didn’t really reassure me - it’s like when you have a headache and you start searching for medical advice online.
I did also see a few positive posts from people making Creme Brûlée for the first time, sharing photos of their successful silky sweets and words of wisdom to all of us lurking behind our computer screens. In the end, it’s only a few ingredients and I was going to get the supplies beforehand, so in this moment of inspiration, I got cracking!
I used this recipe from The Kitchen is my Playground partly because the title said “And it’s not that hard”! The blogger Tracey kept emphasising how simple the ingredients are, and her top tip of using low temperatures to avoid getting scrambled eggs was definitely useful.
When I gathered ingredients, I had a tough time finding “Whipping Cream”. I thought as a Canadian in Australia, perhaps whipping cream here has a different name. It could have also been the shops I went to, but most only had “Thickened Cream” which we do not want! I ended up using “Cooking Cream” which worked like a charm.
It’s so important to get the right cream for this recipe. You need cream that has 30% milk fat, as milk fat is solid, but melts at temperatures just below body temperature. This is what gives Creme Brûlée the melt-in-your-mouth texture that we are looking for.
The berries are optional, but I recommend them as a tasty garnish. I’ve seen other recipes calling for Blood Orange, chocolate, caramel, and much more. Although those sounded super tasty, I figured for my first go at this I should make a classic Creme Brûlée.

So with everything laid out, it didn’t seem too intimidating to get started with buttering the ramekins. Easy peasy, I’d done that before. Then I separated the yolks from the whites. I was super afraid to mess up the recipe if even one drop of egg white ended up in the bowl. I learned that if you leave egg whites in your recipe, they can really scramble up giving that eggy flavour meant for a savoury dish.
The recipe tells you to put the ramekins on top of a paper tower in the baking tray to avoid slipping. I thought it would just decide to disintegrate, but luckily the paper towel lasted (I feel like this could be a great commercial for a paper towel company, but we digress).
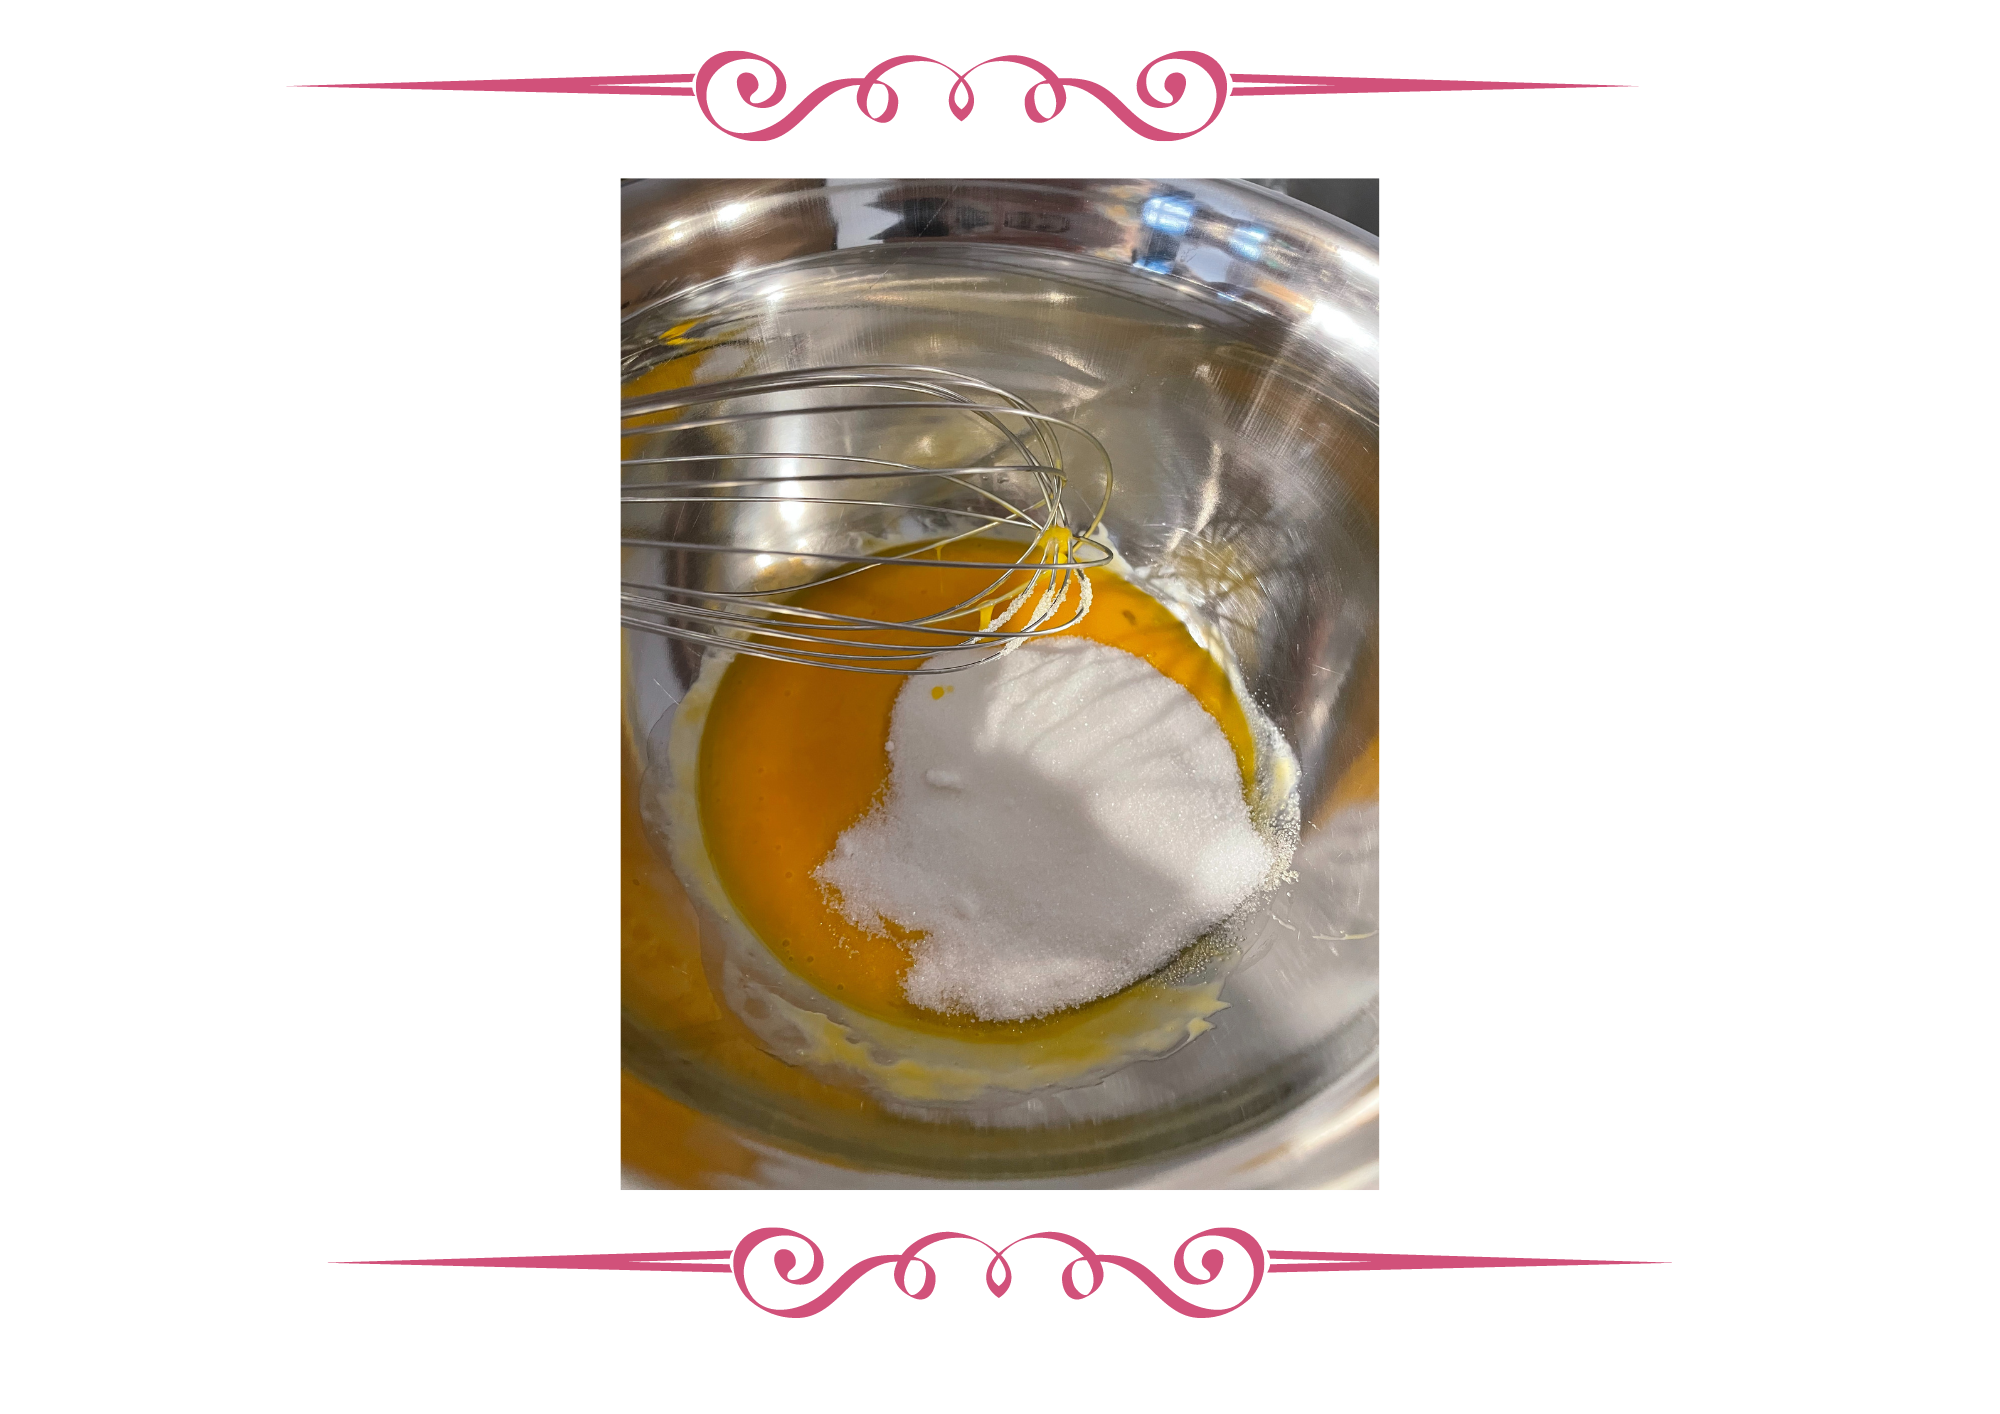
I added sugar to the yolks and then whisked like my life depended on it! Just be careful with whisking so hard that air bubbles form. You also need to make sure the sugar really dissolves into the custard, or you could end up with a grainy Creme Brûlée, aka the opposite of the silky smooth dream we are going for. Once the sugar wasn’t grainy anymore (about 5-6 minutes) I added in the cream and vanilla, which made the sunshine yellow mix look a lot more like…custard.

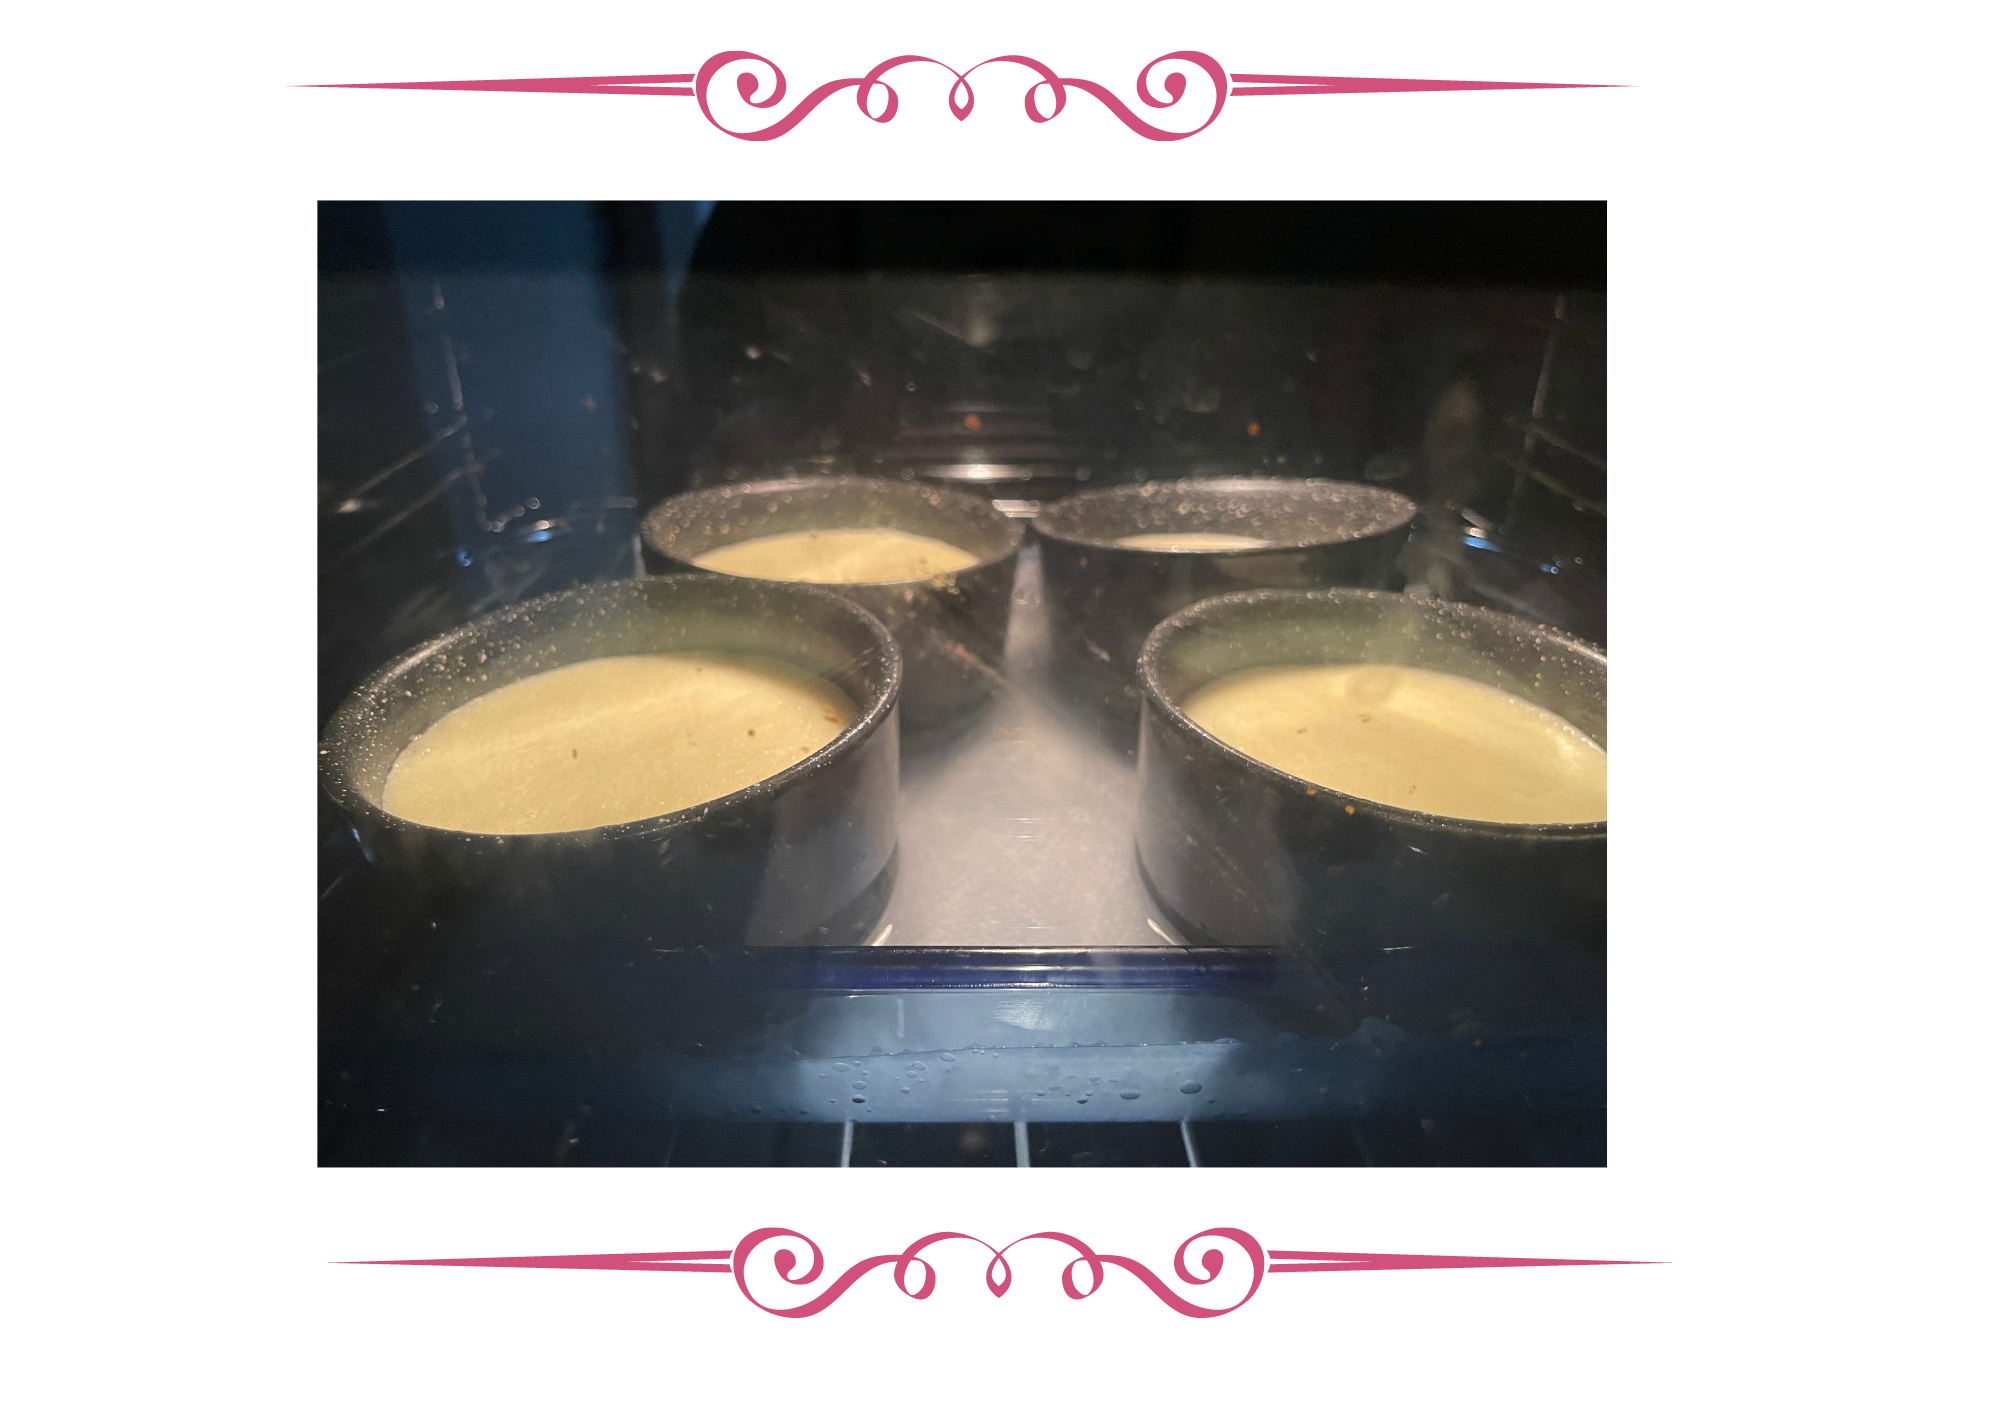
Then it was baking time. One part that was difficult with the size of my oven was pouring hot water into the dish so it ended up halfway up the ramekins (I later learned there’s a French term for this - bain marie). I’ve used water before in baking pans for recipes before, so I knew it would help keep things moist inside the oven. It also, in the case of Creme Brûlée, keeps the custard from cracking. Next time I’d just add the water before and be very careful putting the tray into the oven.
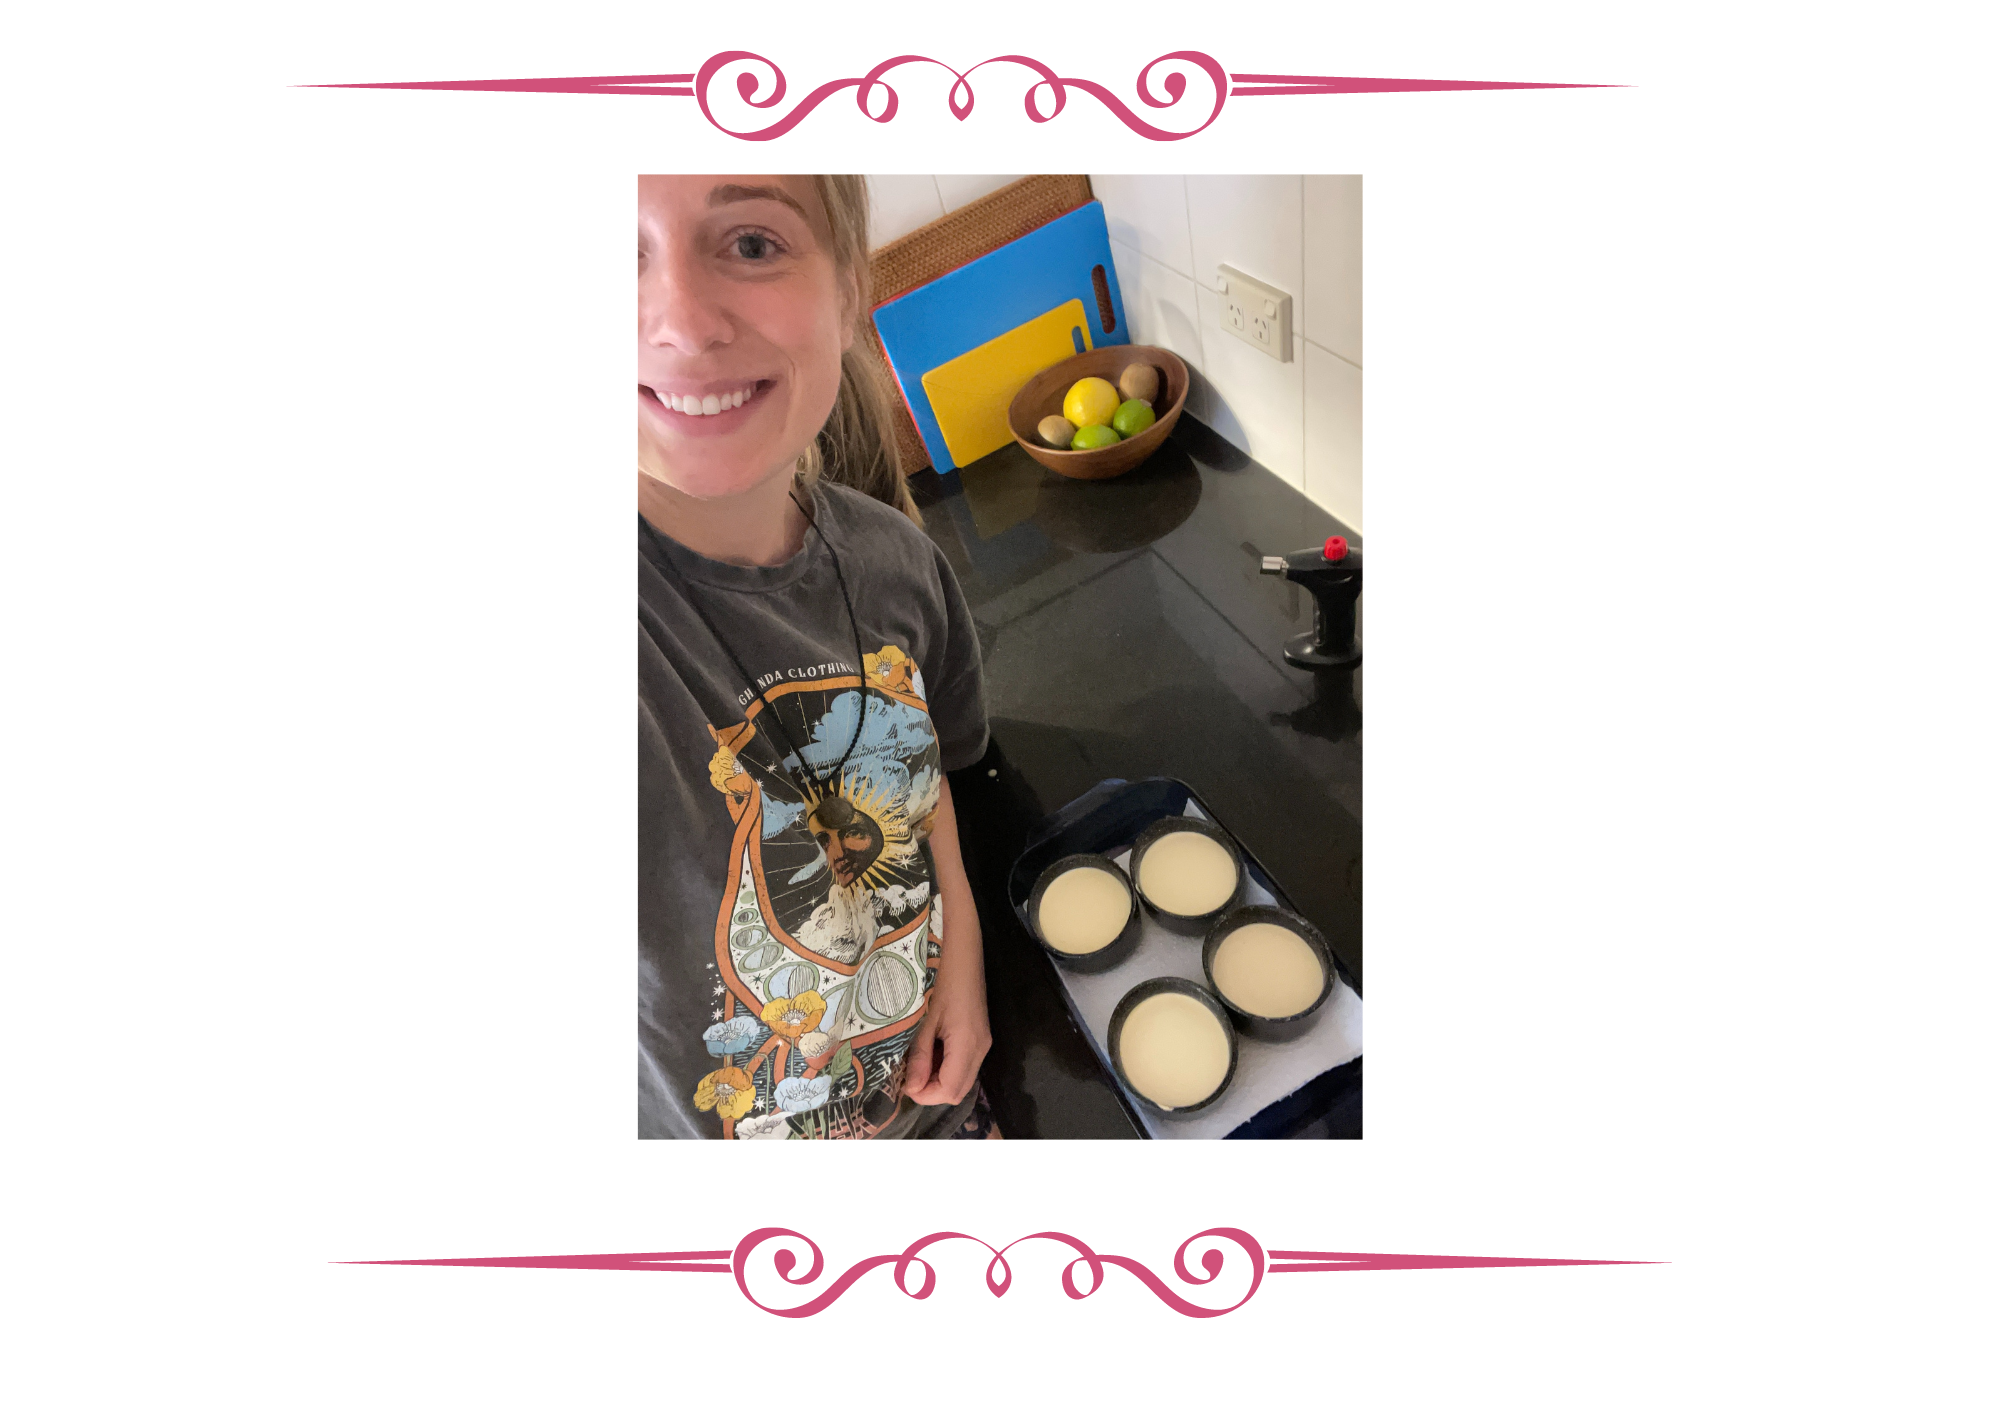
The custards baked for about 45 minutes. Once the time rang on my phone alarm, I gently touched one without puncturing it, let them cool to room temperature, and popped the ramekins into the fridge for about 3 hours. Looking back now, I do wish I waited a few more hours for the custard to chill, but I had started this recipe after lunchtime. I’d suggest if you want to make these for dinner, start in the morning and let the custards chill and set in the fridge longer than a couple of hours.
Caramelising the Crème Brûlée
So this is where things get a little silly. After a few hours of chilling, I have a sneaky peek at my adorable little ramekins in the fridge. The Crème Brûlée looked amazing! I could’ve just eaten one right then and there, but alas, I was on a mission and ready for the kitchen torch. I put a tablespoon of the same granulated white sugar on the tops of my custards, which looked like a lot, but hey, Creme Brûlée already has some sugar and heavy cream in it, what difference would it make at this point?
I read the blow torch instructions very carefully since I’m not a pyromaniac, pulled the safety, fired, and …nothing happened. I had my fiancée check, nothing. Then he asks “Does this blow torch even have gas?”, and that’s when I knew I was in a bit of a pickle.
I frantically started searching for alternatives and grilling (broiling to any North Americans out there) came up. Basically, in an electric oven, you would only use the upper heating element with the door partially open. For a gas oven like mine, many have a lower drawer inside the oven used for this purpose.You grill/broil to help brown and retain juices, typically in meat (think of a crispy roast chicken for example). So in a pinch, this seemed like a good idea.
But admittedly I was in a moment of panic and had never grilled something this way in my life, so I didn’t want to take too big of a risk since I didn’t want to embarrass myself in this blog! So I tried to get a little more DIY.
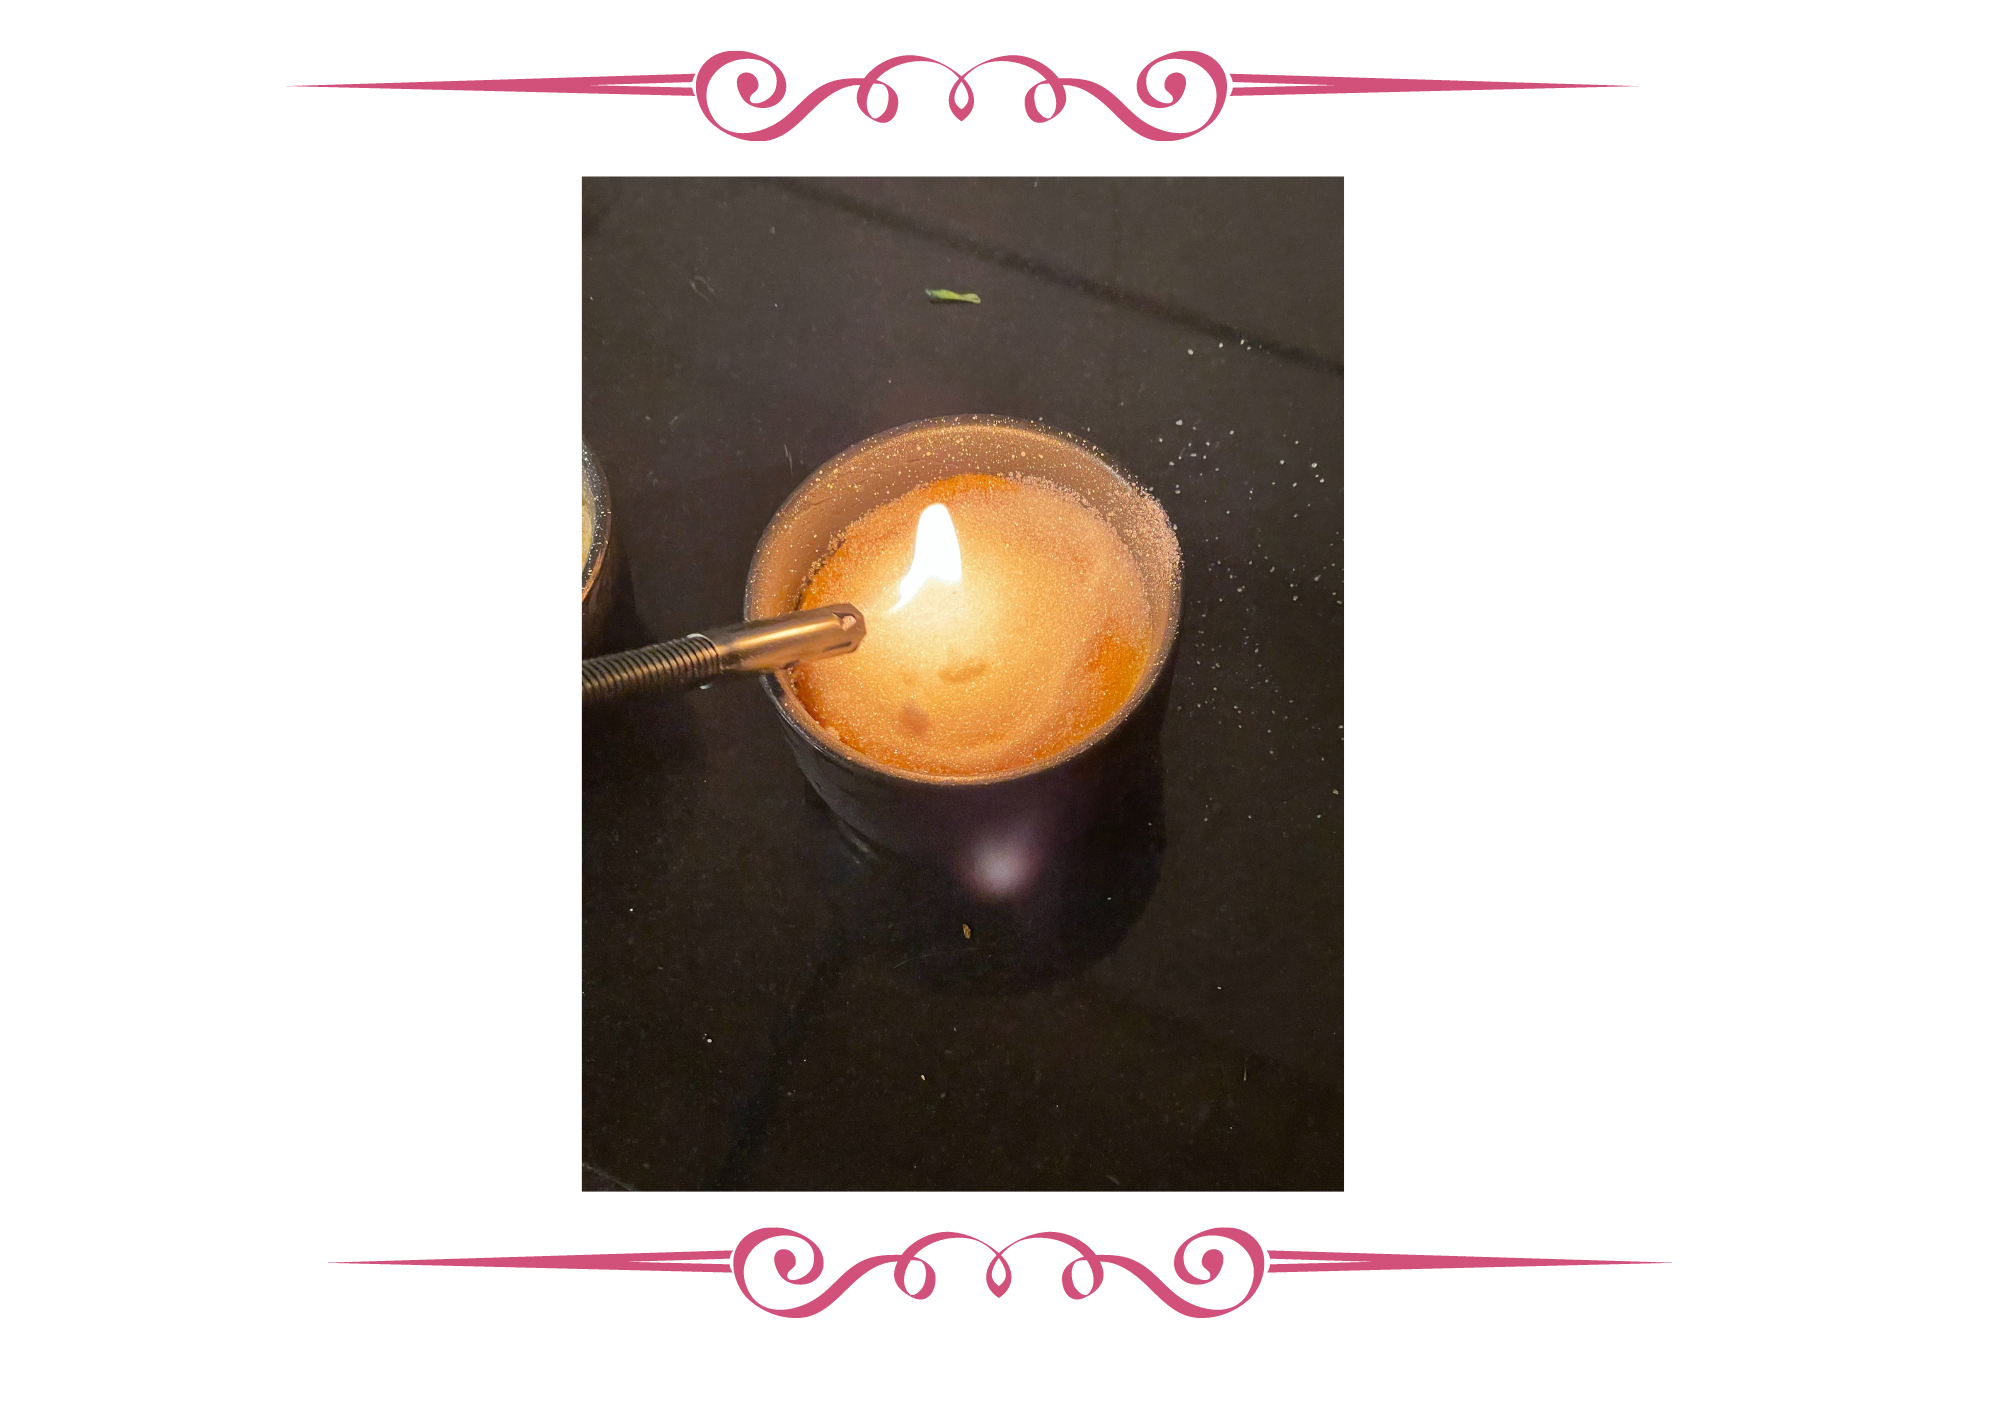
Then I stumbled across an article that claimed I could almost brand the Creme Brûlée with a hot metal spoon heated on a stovetop. This piqued my interest after reading about the “Trinity Cream” which I mentioned earlier. Remember how I mentioned Trinity College used to brand their crest into the cream? I started to think they might have been onto something, so I decided in this moment of desperation to give it a try.
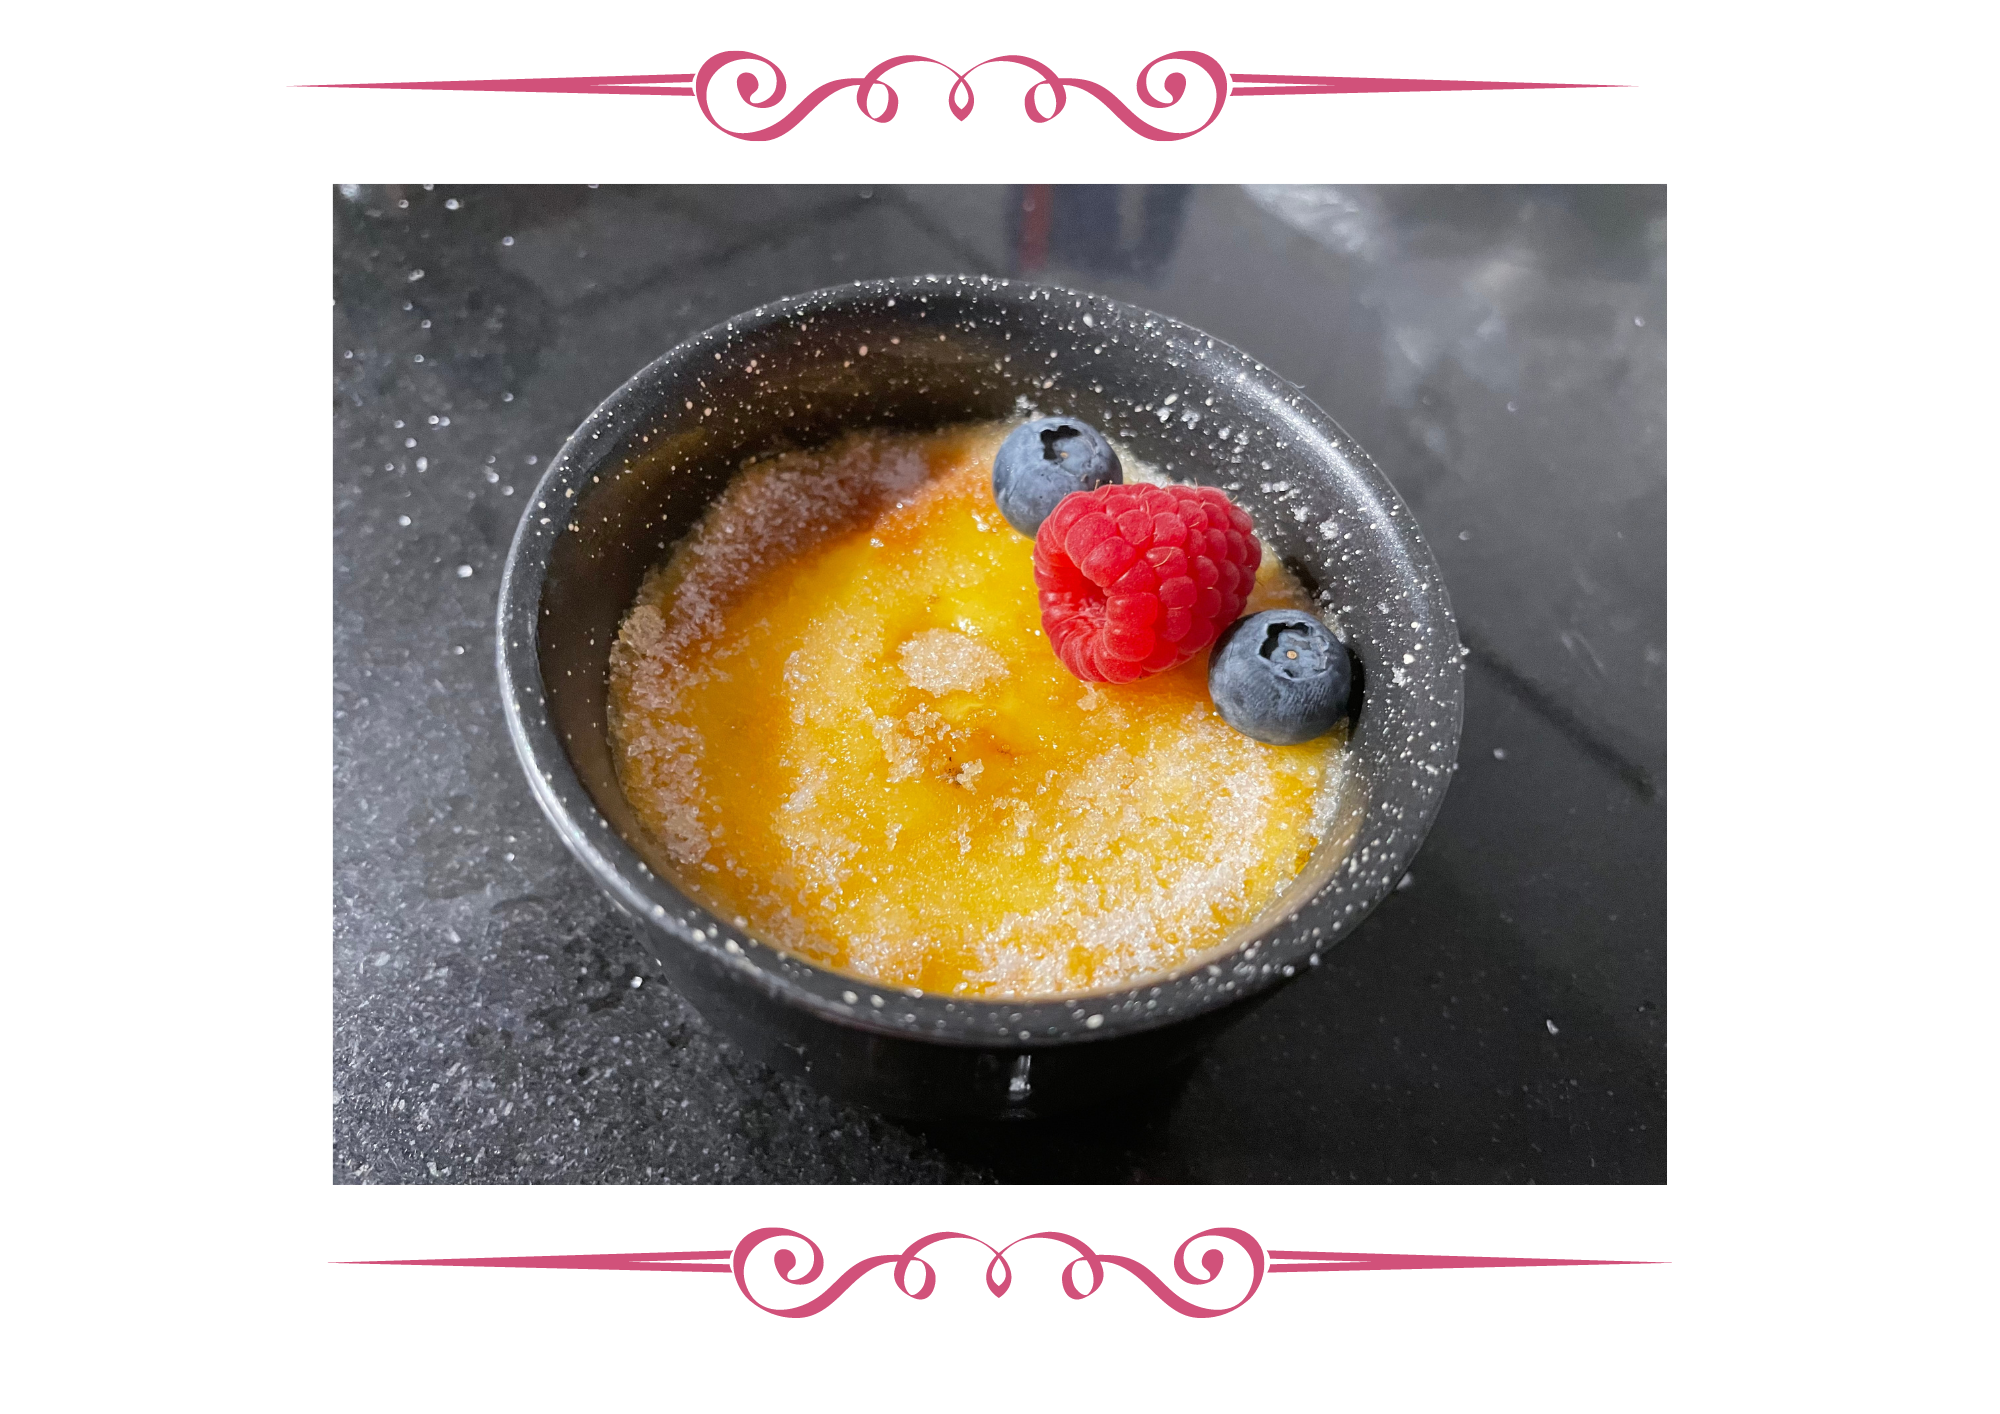
I heated up the spoon close to the gas stovetop flame, and quickly placed it on the top of the dessert and heard a gentle sizzle. I couldn’t see a change in colour but tried this for about 10 minutes. In the end, after trying to think like Macgyver… I never got the ideal crunchy caramelised top I was dreaming of. I was too peckish to wait so I garnished them with raspberries and blueberries and called it a day.

Despite my scramble at the end, the Creme Brûlée tasted delicious! The consistency was perfect- firmer on the sides, but soft and jiggly towards the centre. They were creamy and had a hint of vanilla flavouring, which was divine. My fiancée said it was genuinelytasty, the only thing was because the sugar on top wasn’t melted it had a bit of a white sugar sprinkle instead, so when we had the second batch the next evening we didn’t even bother attempting to heat/grill/brand the custards.
Et Voila! A super easy dessert to make if you have all the equipment!
This is a truly decadent recipe, as all Crème Brûlée are, so I wouldn’t make them all the time, but they could be great to make for that housewarming party I’m planning. I am getting married later this year too, so maybe I’ll get someone to make a giant Crème Brûlée for us instead of a cake!
Kaicea’s Top 3 Tips:
Make sure your blowtorch has gas or grill/broil the Crème Brûlée ! I feel like I missed out on the fun (and the cracking of the top when I was about to eat one)!
Follow the instructions to a tee. Although the ingredients are simple, there’s plenty of instructions you want to follow as closely as possible to avoid a culinary disaster.
There’s a lot of cooling and chilling involved, so don’t expect the desserts to be ready in an hour. You need a minimum of 2 hours to chill the custard, not counting sitting in the water until it cools, or after blow torching the tops.
In the end, if you want to surprise your loved ones, Crème Brûlée is easy to make but looks très chic. Forget what Marie Antionette said about letting them eat cake - let them eat Crème Brûlée!
Recipe: Crème Brûlée
Recipe: Crème Brûlée
This recipe will make 4-6 Creme Brulee
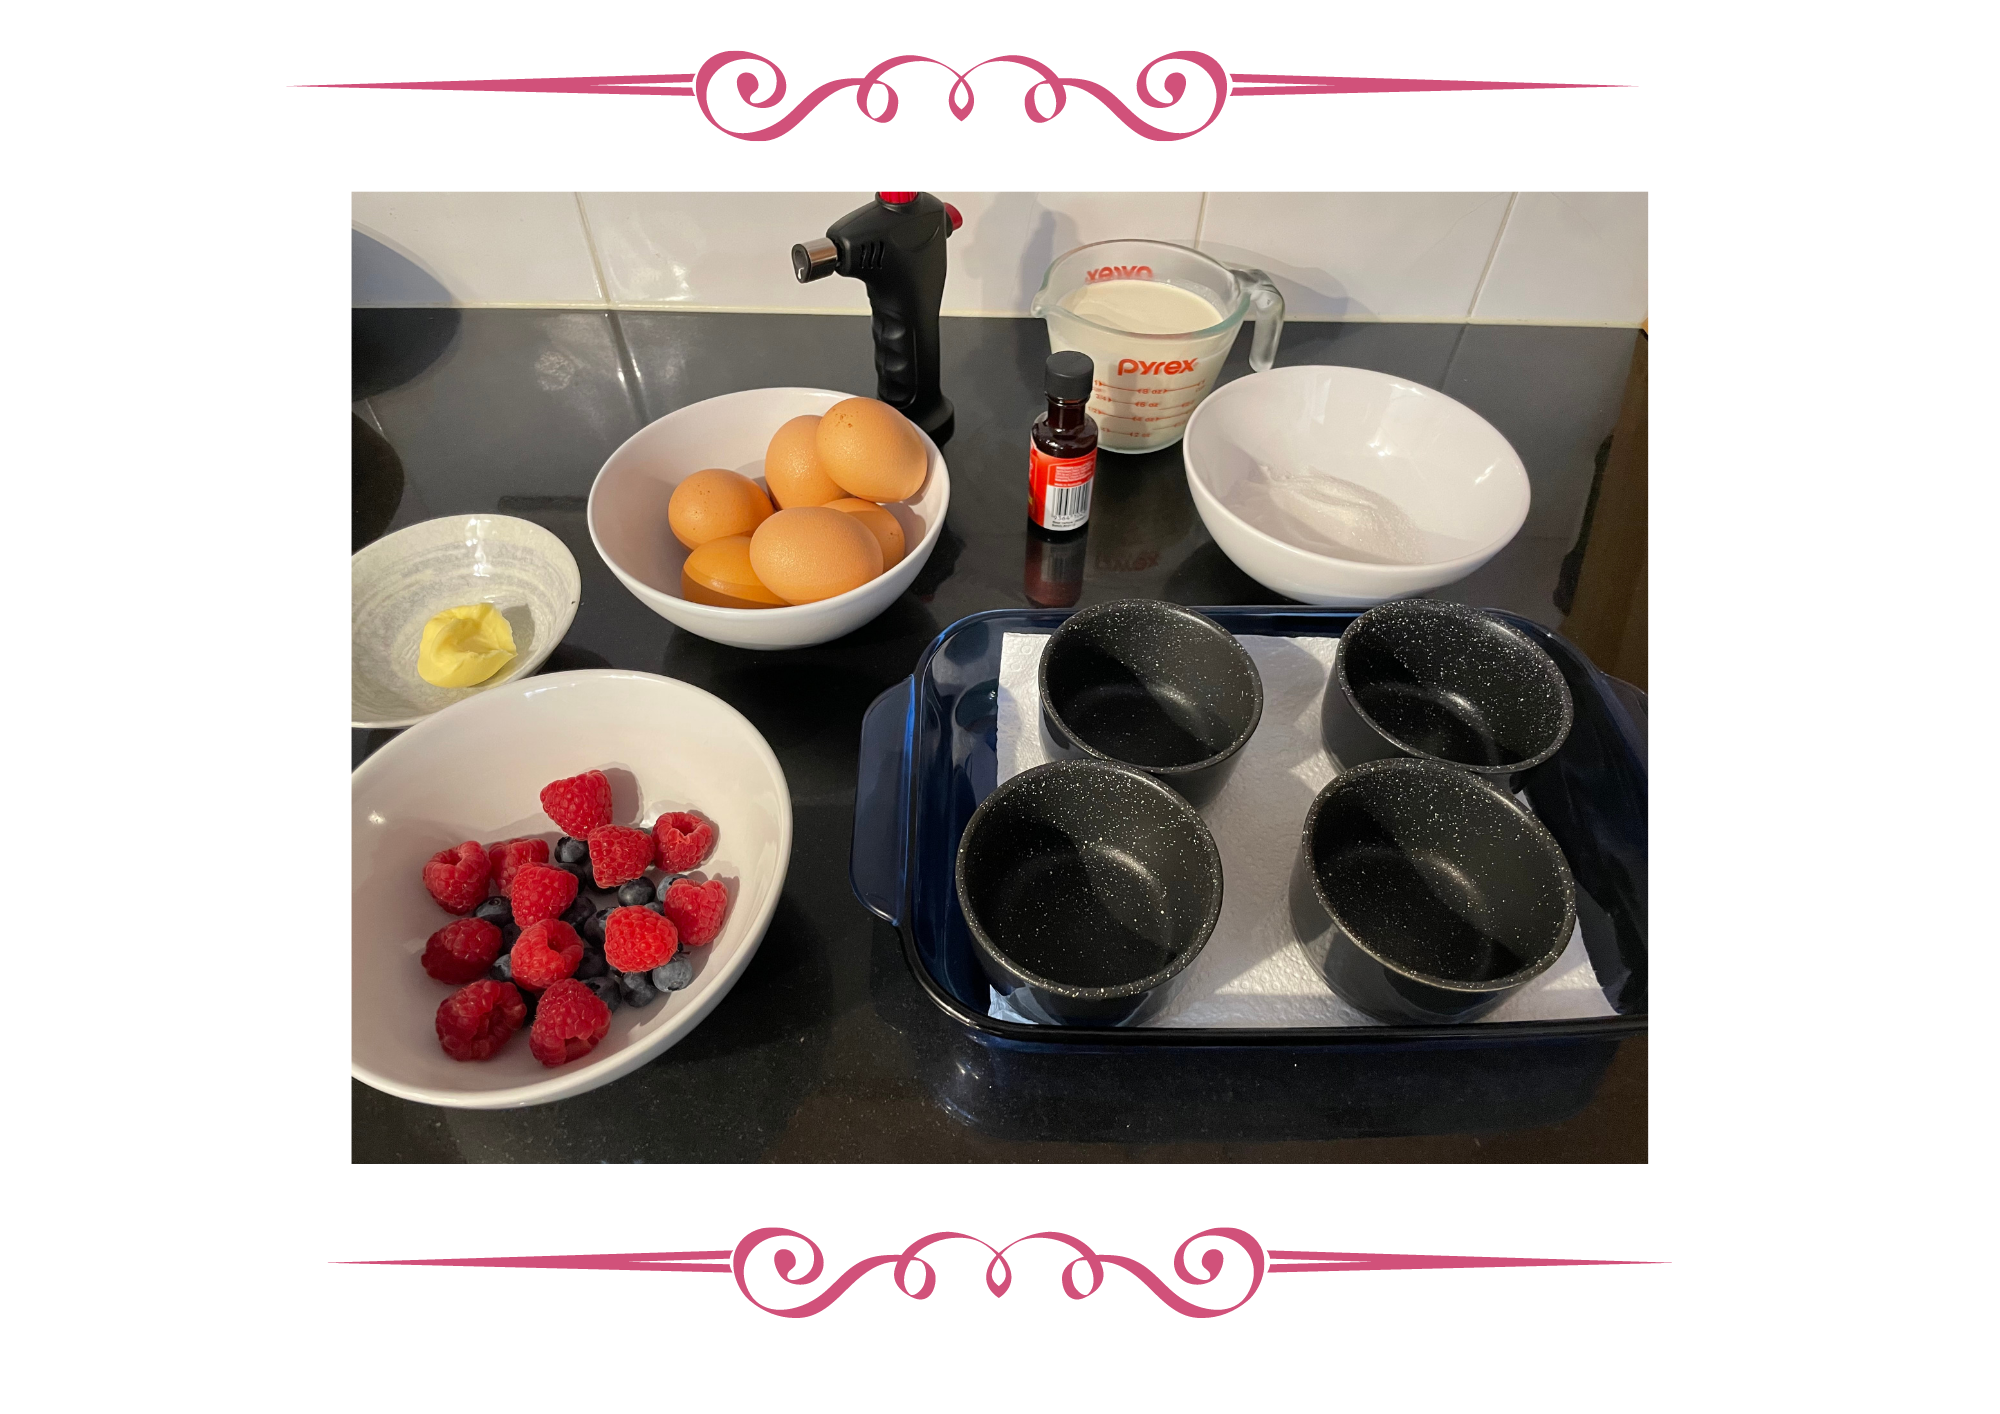
Ingredients:
1 Tablespoon of butter, softened6 egg yolks
6 tablespoons of granulated white sugar
1 and a half cups whipping cream
½ teaspoon pure vanilla extractExtra granulated white sugar for the Brulee part
Berries (optional)
Equipment:
Ramekins - The recipe calls for 6 little ramekins but I used 4
A kitchen torch (or the ability to grill/broil with your oven)
A baking tray with high sides
Whisk/hand mixer/electric mixer
Paper Towels
Mixing Bowl
Instructions:
1:Preheat the oven to 135 C (275 F). While it’s heating, butter the insides of your ramekins. Line the bottom of your baking dish with a paper towel now to avoid the ramekins sliding around when you pour the water into the dish.
2:Separate the egg yolks from the egg white. Whisk the yolks until slightly thickened. Add the 6 tablespoons of sugar into the yolk and whisk until granules have melted into the mix. Add whipping cream and vanilla into the mix and whisk well.
3:Pour your custard mixture evenly into the ramekins. Grab some hot water from the sink (not boiling water) and pour in the baking dish until it sits halfway up the ramekins. Leave uncovered and bake for 45-50 minutes (if you have deeper ramekins this could take longer).
4:When they look set around the edges but still jiggly in the middle, remove the baking dish and keep the ramekins in the water bath until the water cools down. Then add cling wrap to cover the custards and let them chill for a minimum of 2 hours in the fridge.
5:When you’re ready to serve, sprinkle the granulated sugar over the custard (the recipe online calls for 2 teaspoons each custard). Use the blowtorch, then rechill in the fridge for another few minutes.
6:Garnish with berries and serve!