As the Brisbane Experience Launcher, I always have my head in an article, my ears in a podcast or my eyes on the street to keep my projects fresh and current. Having recently been very focused on sustainability, and what this buzz word means to different people, I stumbled upon a lot of articles around upcycling and repurposing household and lifestyle items. Not being a particularly crafty person (or patient person come to that!) I decided to give a couple of suggestions a go to see how easy they really are for the everyday person.
Repurposing household items and having some fun styling them however you want is a great way to spend a couple of hours. If you are like me, not very good at sitting still, this task may be great activity for a little ‘you time’ away from the everyday humdrum, whether that be work, family commitments, or just a busy mind. Not only that, but reusing already manufactured items is helping closed-loop recycling, whereby we are simply creating a new version of something and giving it a new identity.
Read on to see what happened and how successful I was.

I love organisation. When I saw this upcycling idea for transforming old jars into trendy storage containers, I was sold.
Most of us have jars in the fridge that are near empty, so I just transferred the contents of my selected jars into Tupperware containers and washed them out ready to go. Make sure you think about what items you wish to store or organise in order to establish the size of jars required. I like to bake, so I decided to organise some of my ingredients.
Tip 💡 A couple of my jars still had a sticky residue after I had taken off the labels, so I soaked them in boiling water for 30 minutes.
Apparently, animal-lid jars are very much on-trend right now, and I had some dinosaurs left over from a previous project, so that is what I chose to go with. As I don’t have kids, I decided on a Rose Gold colour scheme for my jars, rather than lots of different brighter colours, as suggested by Holly in the article.
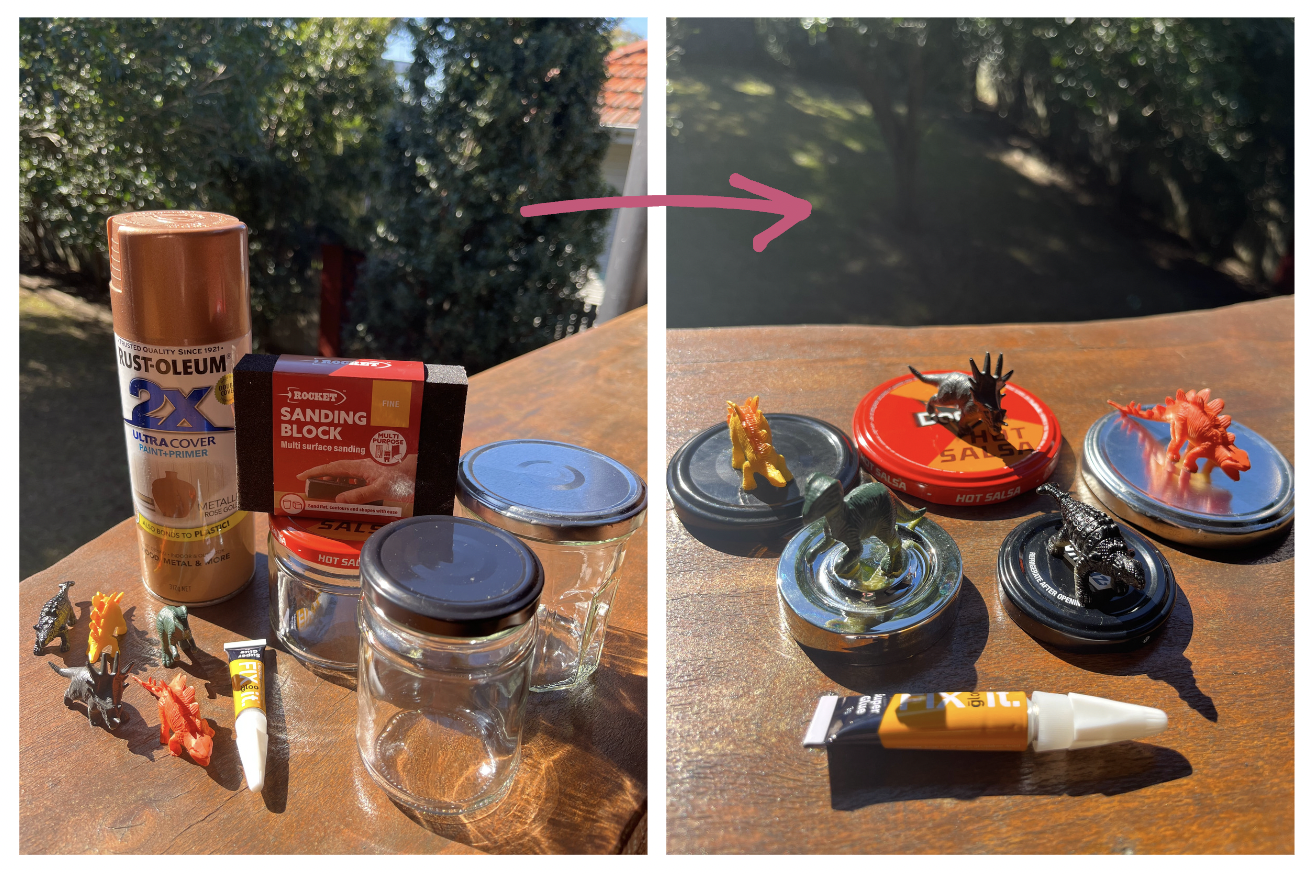
Tip 💡 The ‘you will need’ list requires a surface primer, however, I managed to purchase Paint & Primer in one, by the same brand, Rust-oleum. So, if like me, you want to spray all your jars in just one colour, this is a good money saver.
Once my lids and jars were clean and ready, I took my project outside.
My jars were all quite small, so I did not feel a need to mark out with a pencil where I was going to glue my dinosaurs. I also like a little bit of irregularity, so just gluing them straight on to the lids worked well for the look I was hoping to achieve. I sanded the feet very gently, and then used a regular superglue from Spotlight, which dried in less than five minutes.
Note 🗒️ Some of my lids were still branded, but the Primer Paint is good enough for full coverage, so don’t worry about whether your lids are blank or not.
Once the glue was dry, I took them to a well ventilated area in the yard, and laid down some cardboard to ensure I was not spraying the lawn or anything else close by. Make sure it is not a windy day and wear some old clothes at this point, as the spray is very fine and does travel easily.
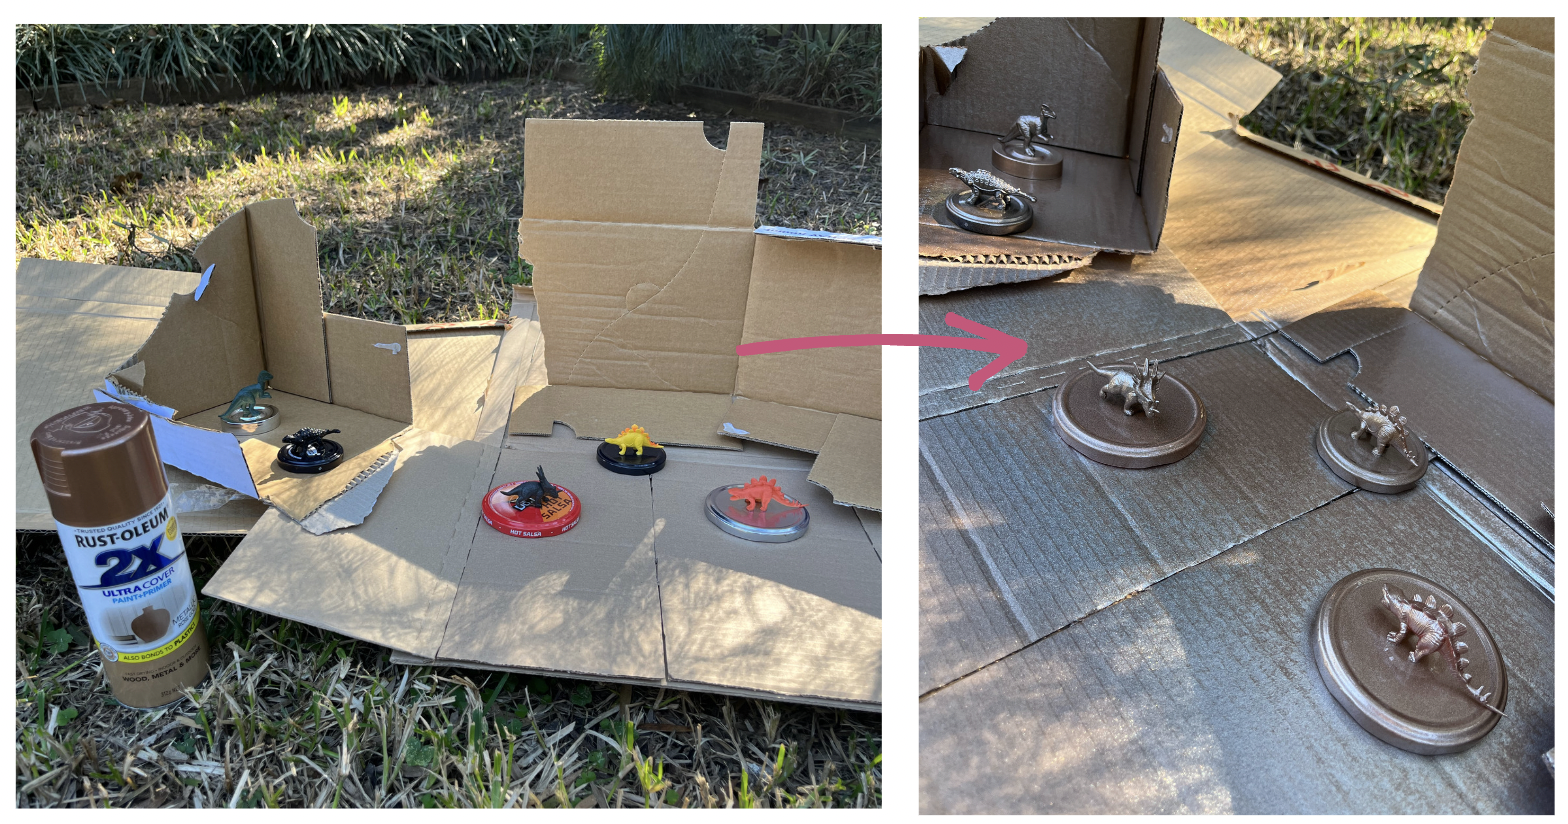
The spray was easy to use, but be sure to read the directions on the can before use. I sprayed at a 30cm distance across all angles, ensuring a light coverage and making sure I got the dinosaur underbellies too! I left them to dry for 30 minutes, and then repeated with a second spray of paint to ensure full coverage, and until I was happy with the colour.
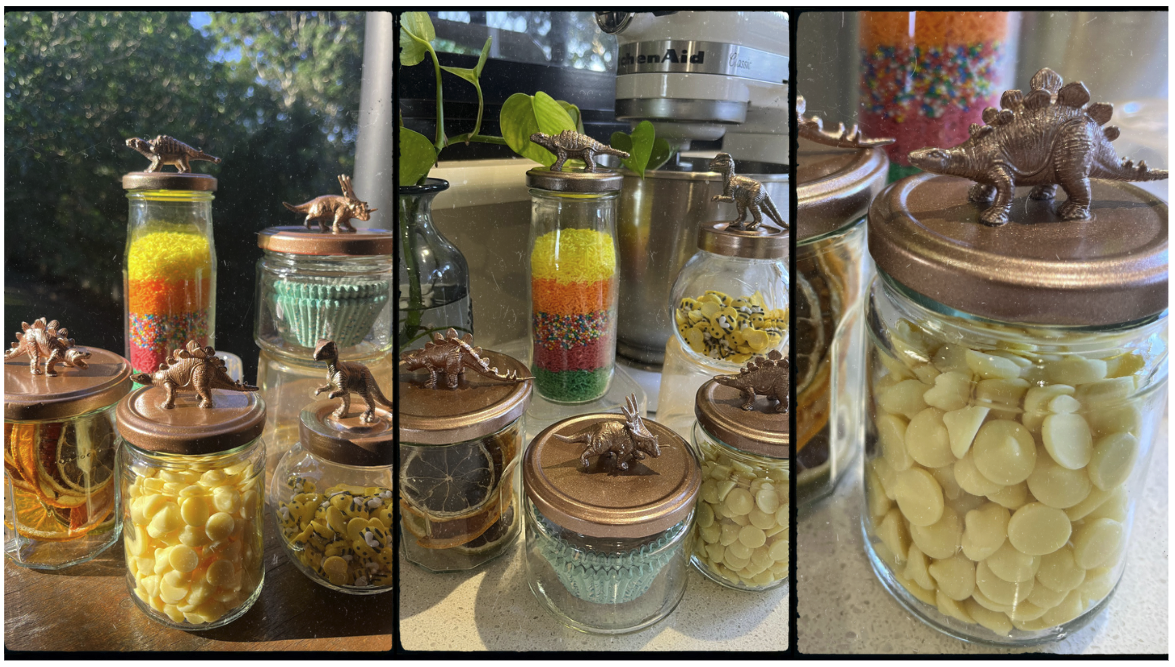
Then came the fun bit of filling them. I used white chocolate drops, cupcake liners, dried citrus slices, rainbow sprinkles, and sugar bees. The result was pretty rose gold fun jars that have added a little fun to my kitchen counter!
Have a great time making yours. This was simple and a lot of fun!
Easy to replicate 5/5. Cost 4/5. Fun factor 4/5.
Suitable for: Anyone who likes organisation. Great activity to do with kids too, as long as they are supervised.
Worth it? I think this is absolutely worth a go. It didn’t take too much time, needed few resources and was a cheap and fun way to repurpose what otherwise would have ended up in the recycle bin.

Correct me if I am wrong, but I think almost every household owns a tray of some kind. Most of these live in a cupboard, or are most certainly under utilised and hidden away. It is a crying shame, as there are so many wonderful uses for them. Therefore, when I saw this idea I was instantly enthused to upcycle my boring black IKEA tray and turn it into something that should be seen.
The ‘materials’ list did make me a little nervous, as I saw specifics such as gold leaf and a gilding brush and adhesive, all of which I am not familiar with. Never the less, I figured I would do a little further research and give it a go.
Tip 💡 Following a little more reading around gold leaf, I established that Modge Podge also works as a replacement for gold leaf adhesive, as well as there being cheaper gold leaf alternatives available. I purchased imitation gold leaf by Craft & Create, from Officeworks.
I always keep gift wrap in a box in the cupboard, and so quickly found a pattern of choice. I decided to go a little more minimalist than the article suggested, opting for bees. The wrap was double sided, so I played around with the idea of adding the honeycomb element, before abandoning the idea. The great thing about this part of the upcycle is that you can play around as much or as little as you like. Make the design complex, make it simple, change it ten times. Until you glue it, nothing is decided. Mind you, if you are indecisive, perhaps set yourself a time limit!
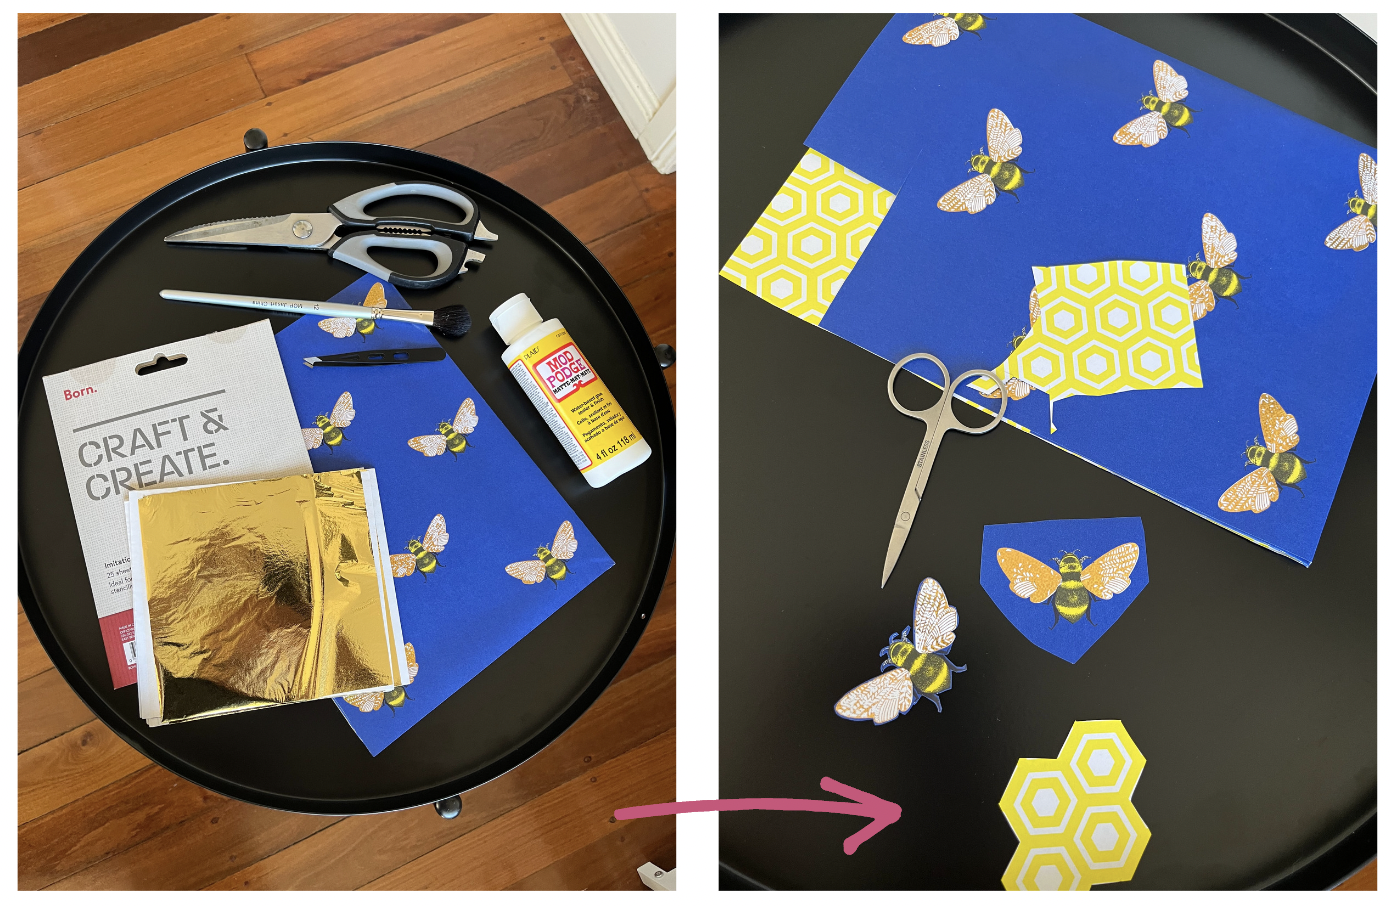
Tip 💡Take your time when cutting out your chosen pieces, as there is nowhere to hide if you rush it. I used two different pairs of scissors as the bee was fairly intricate.
Once the pattern was decided and my cutting was complete, I was ready to glue. I chose a matte Modge Podge, which was easily applicable. I wanted my look to be fairly rustic overall, but do be aware if you are looking to achieve a more polished result, carefully consider what brush to use as the strokes are very visible, particularly on black.
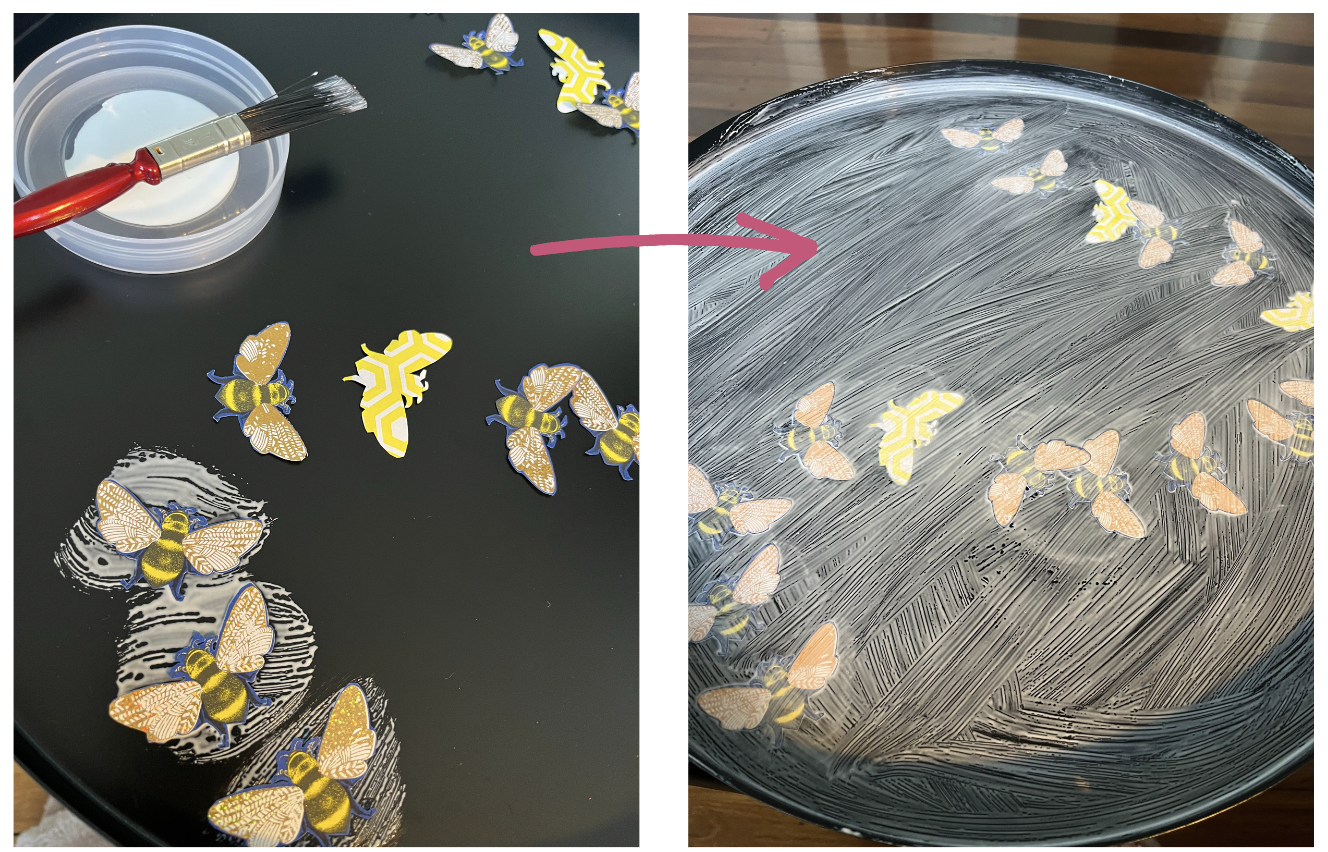
I left the first layer of Modge Podge to dry overnight, before applying a second coat. However, if you are looking to complete the project on the same day, it is easily possible.
When the tray was dry, it was ready for the gold leaf. As I opted for the imitation gold leaf, I was able to emit the cotton gloves, and also did not need to wait for the adhesive to become tacky. I was a little nervous of the gold leaf and how successful this part would be. However, I found the imitation to be less fragile than I feared and so I was able to handle it with clean hands, and apply straight onto the Modge Podge.
I wanted a fairly rustic edge to my tray, and also decided at this point, I would add gold flecks over the entirety of the tray. This is where the freedom to make your tray however you wish may evolve as you go. Just have fun with it!
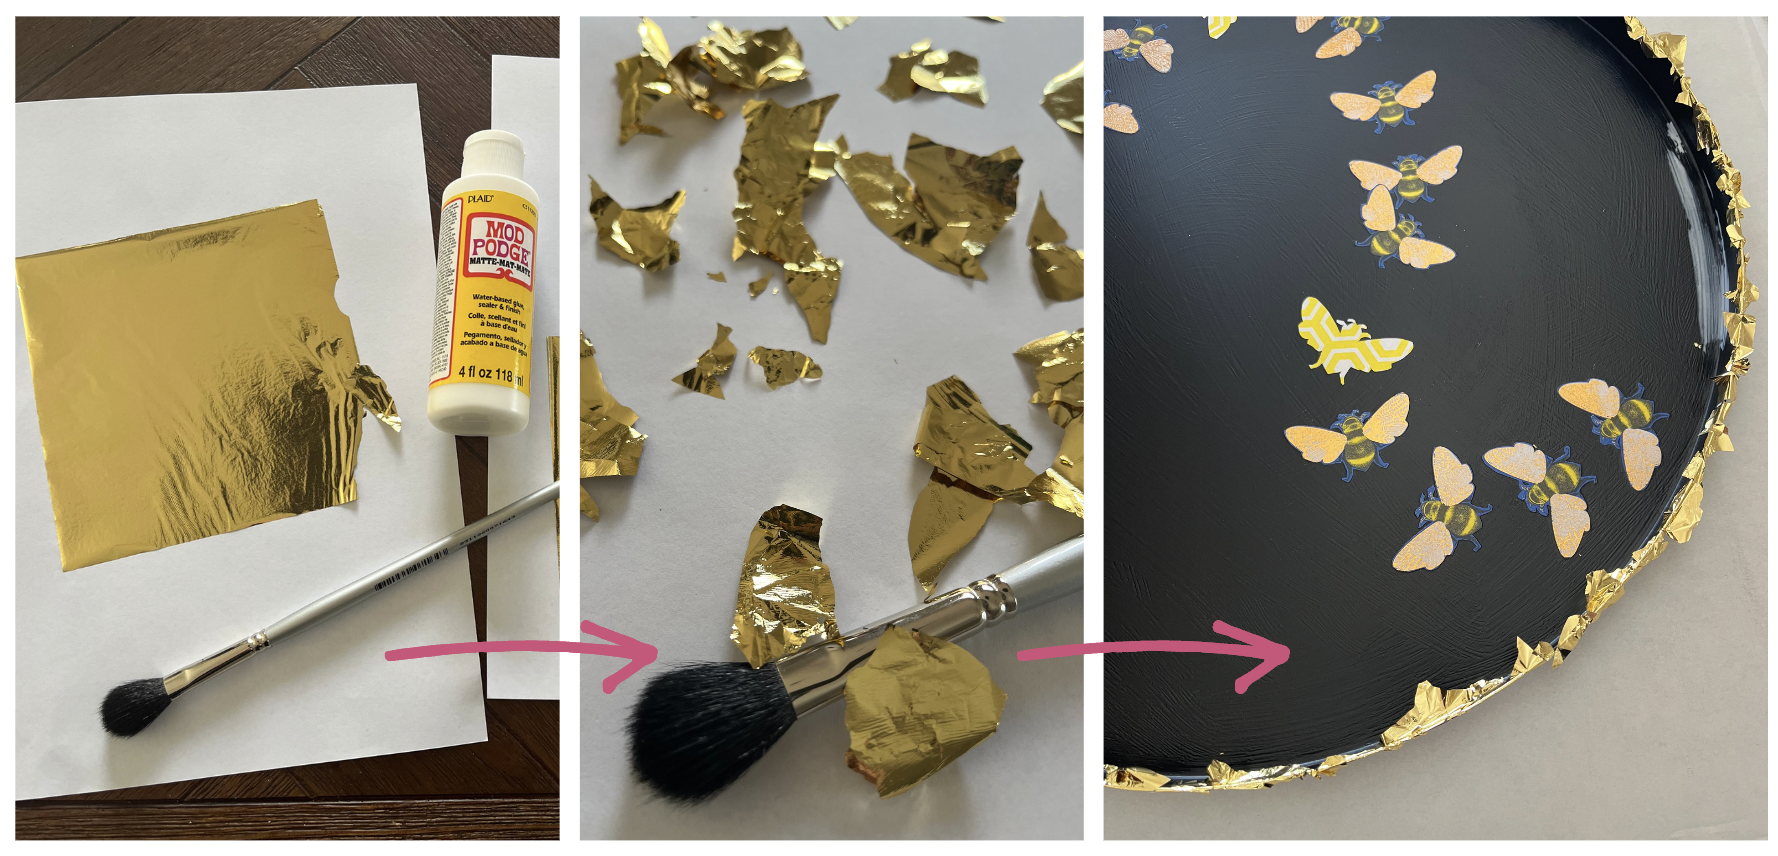
I let the gold leaf dry for an hour or so before brushing off the excess.
Tip 💡Gently sweeping the gold off with the brush allowed me to use it on the rest of the tray, so there was zero waste. I also had lots of sheets left over for another project, which was a bonus.
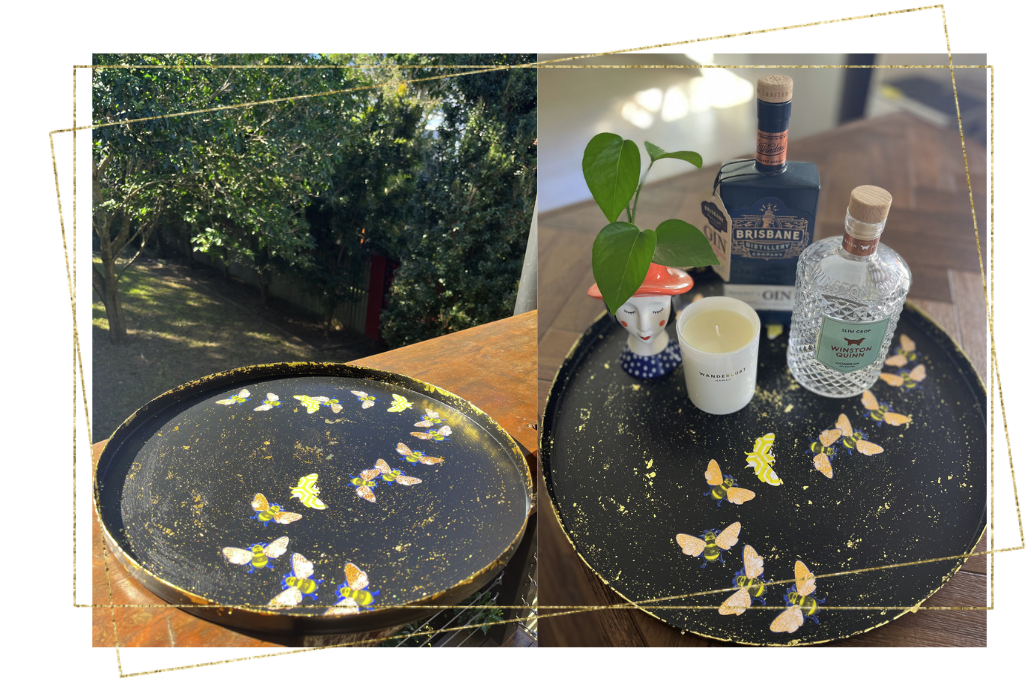
I gave it another layer of Modge Podge and then left it to dry. Ta Daaaa…. My beautiful new tray!
Easy to replicate 4/5. Cost 5/5. Fun factor 5/5.
Suitable for: This one is a little more tricky, especially when it comes to the gold leaf. Anyone who has a naturally crafty side will absolutely love it, and even if you don’t, like me, I would still recommend giving it a try (as long as you are not seeking perfection).
Worth it? Absolutely. I have turned my boring black tray into something I love. I enjoyed the freedom of it turning out however I wanted, and letting it organically develop as I went.